Cloudockit's Optimal Setup - MSP - AWS
The purpose of this document is to provide the detailed steps to install and configure Cloudockit Desktop in an optimal way so you can get going as quickly as possible with your automated documentation generation for your AWS environment.
Cloudockit desktop can be installed in many ways. On a workstation, on a server, on a virtual machine.
Based on our experience we have identified that the optimal way is to create an EC2 instance and install Cloudockit desktop to automate your document generation.
Step 1 – Create the IAM User
Your chosen IAM User will be used to list all of the accounts in the organization to enable Cloudockit Desktop to loop through the accounts and assume roles in each of them.
Create the User
Sign in to the AWS Console and open the IAM console: Amazon IAM
In the navigation panel, choose Users, press Add user.

Set User details and Select AWS access type
Enter a name
In Access Type, check Programmatic access
Click: Permissions

Create the Policy
Select Attach existing policies directly.
Click: Create Policy

Make the following selections:
- In Service, select Organizations
- In action, select Access Level / List Accounts and ListAccountsForParent
- In Resources, select All resources
Click: Review Policy

Give your Policy a unique name and press Create Policy.

Close the opened tab to create the new policy.
Go back to the user creation screen and refresh the list.
Select the newly created policy
Click: Tags

Add Tags
Add tags based on your organization’s policies.
Click: Review

Review
Review the parameters and create a user.

Save the Access key ID as well as the Secret access key in a safe place.
You will need them to authenticate the account for Cloudockit.

Step 2 – EC2 Instance Role and Policies
Let’s create a policy and the role required for the EC2 instance to access the accounts and generate documentation.
Create a Policy
Connect to the AWS Console and select IAM.
Select Policies and press Create Policy.

Select the JSON tab and paste this JSON into the window.
{
     "Version": "2008-10-17",
     "Statement": {
             "Effect": "Allow",
             "Action": "sts:AssumeRole",
             "Resource": "*"
          }
}
Click: Review Policy

Give the policy a unique name and press Create policy.

Add Tags
Add tags based on your organization’s policies.
Click: Review

Review
Give the policy a unique name and review to make sure everything is in order.
Click: Create Role

Create an EC2 Role for Cross-Account Documentation
Connect to the AWS Console and select IAM.
Select Roles and press Create role.

Under Select type of trusted entity, select AWS Service.

From the Attach permissions policies screen select the following policies:
- ReadOnlyAccess
- CDKOptimalAssumeRole (Name of the policy you have created in the previous setup)
Click: Tags

Add tags based on your organization’ss policies.
Click: Review

Enter a unique name for your role.
Review the parameters and press Create Role.

Step 3 – Creation of the EC2 Instance
Connect to the AWS Console and go to the EC2.
From the EC2 Dashboard page Press the Launch instance button.

Choose an Amazon Machine Image (AMI)
Select Microsoft Windows Server 2019 Base. (Linux OS is not supported).

Choose an Instance Type
We have identified that Cloudockit Desktop performs at its best with 4 CPUs and 16 GiB of memory. You can however choose the type that you prefer.

Configure Instance Details
Configure the instance based on your organization’s best practices and make sure to select the CrossAccount IAM role created in the previous step.

Add Storage
You can leave the default parameters.
Add Tags
Add the tags based on your organization’s tagging policy.
Configure Security Group
Create or assign a security group based on your organization’s security policies.
Review Instance Launch
Review the parameters that have been set and press launch to create the instance.
Step 4 – Installing Cloudockit Desktop
Downloading the Document
You can get the Cloudockit installation file from our website.
Press the Download Now button to get the MSI.

Launch your instance and copy the MSI file on the instance.
Double click the Cloudockit icon to start the installation.
Click: Next

Carefully read the terms in the license agreement.
Check the box “I accept the terms in the License Agreement”.
Click: Next

Select the path where you want to install Cloudockit Desktop.
Click: Next

Click: Instal

Once the installation is complete.
Click: Finish

Step 5 – Creation of the Bucket
The bucket will allow you to save the documentation and be available to employees in your organization.
From the AWS Console, select S3
Press Create bucket in the upper right corner.
General Configuration
Name your bucket and select the Region of your choice.

Bucket Settings for Block Public Access
Define the public access based on your organization’s best practices.

Bucket Versioning

You can enable or disable bucket versioning based on your preferences.
Tags
Add tags based on your organization practices.

Default Encryption

Ensure to copy the Bucket ARN in a secure place. You will need it later.
Click: Finish
S3 Bucket Policy
You must now give your IAM user the policy to allow the S3 bucket to drop the files that Cloudockit will create.
Sign in to the AWS Console and open the IAM console at https://console.aws.amazon.com/iam/.
In the navigation panel, choose Users and search for the user you created.
Select the username

Click: Add Permissions
Add Permissions to Users
Select Attach existing policies directly.
Click: Create Policy

Create Policy
Select JSON tab and paste the following code in the window.
{
     "Version": "2008-10-17",
         "Statement": [
         {
             "Effect": "Allow",
             "Action":[ "s3:*" ],
             "Resource":[ "arn:aws:s3:::cdkoptimalsetup" ]
          }
     ]
}
Under the Resource value, make sure you replace arn:aws:s3:::cdkoptimalsetup with the Bucket ARN saved in the previous step.
Click: Review Policy

Review Policy
Give your policy a unique name, a description and press Create Policy.

Storage Account
{
    "Version": "2008-10-17",
    "Id": "Policy1335892530063",
    "Statement": [
        {
            "Sid": "Stmt1335892526597",
            "Effect": "Allow",
            "Principal": {
                "AWS": "arn:aws:iam::xxxx:user/xxxxxxx"
            },
            "Action": "s3:PutObject",
            "Resource": "arn:aws:s3:::yourS3Bucket/*"
        }
    ]
}
Step 6 – Policies
Now that we have a user created, an EC2 Instance created as well as a storage account, it is time to apply the policies.
Policies were already given to the user account in the previous step, therefore it has read access at the account level.
AWS Billing
To read billing information from AWS, the credentials used to generate the documentation must have “aws-portal:ViewBilling” policy.
AWS Trusted Advisor
To read information from AWS Trusted Advisor, the credentials used to generate the documentation must have the following policy.
{
     "Version": "2008-10-17",
     "Statement": [
         {
              "Effect": "Allow",
              "Action":[
                       "ce:Get*",
                       "ce:List*",
                       "ce:Describe*"
              ],
              "Resource":[ "*" ]
         }
     ]
}
AWS Organizations Accounts
In the generated documents, if you want to view details of the accounts from your organization, you will need to choose an AWS master account when logging on Cloudockit website.

AWS Organizational Units and Accounts
If you want to view details of the organizational units and accounts of your organization in the generated documents, you will need to choose an AWS master account when logging on Cloudockit website.

AWS Member Account
When you choose an AWS member account, the generated documents will display the information of your organization and minimum information about your account (e.g.: Id, ARN).
Step 7 – AWS Cross-Account Roles
In each AWS Account you want to scan, you need to create a role named CloudockitScanRole (or any name that you prefer).
Here are the steps to create this role:
From IAM console, click on Roles and then Create role.
- Select Another AWS Account. Enter the Account ID where you are installing the EC2 instance that will run Cloudockit Desktop.
- Click Next and select the ReadOnlyAccess
- Click Next: Review
- Enter the name: CDKOptimalScanRole (Or which ever name you gave it)
- Click on create role
- Repeat those steps in all AWS Accounts
Step 8 – Launch Cloudockit Desktop and Schedule a Document Generation
Connect to the EC2 Instance created.
Launch Cloudockit Desktop.
Activating Cloudockit
Click on the desktop shortcut of Cloudockit to launch the application.
You will need to enter your product key to activate Cloudockit Desktop.
If you haven’t purchased a product key, please visit https://www.cloudockit.com/pricing/
You will see a message confirming that the activation was done successfully.
Click: OK
Connecting to an AWS Platform
Select Start or Schedule a Document Generation

Select Cross-Account Role.

Select AWS from the list of platforms.

Enter the Access Key ID, Secret Access Key, and Role to Assume.
Click: Login

You now need to select the accounts you want to document.
Click: Continue

Schedule a Document Generation
Now that you are logged in, it is time to define what information you want to generate using Cloudockit.
Set the desired parameters under Documents, Workloads, and Organize Content.
Track Changes
Use the storage account created previously for track changes. This will allow you to see the differences that have occurred between a previous document generation and the one running right now.
Select Track Changes from the left menu.
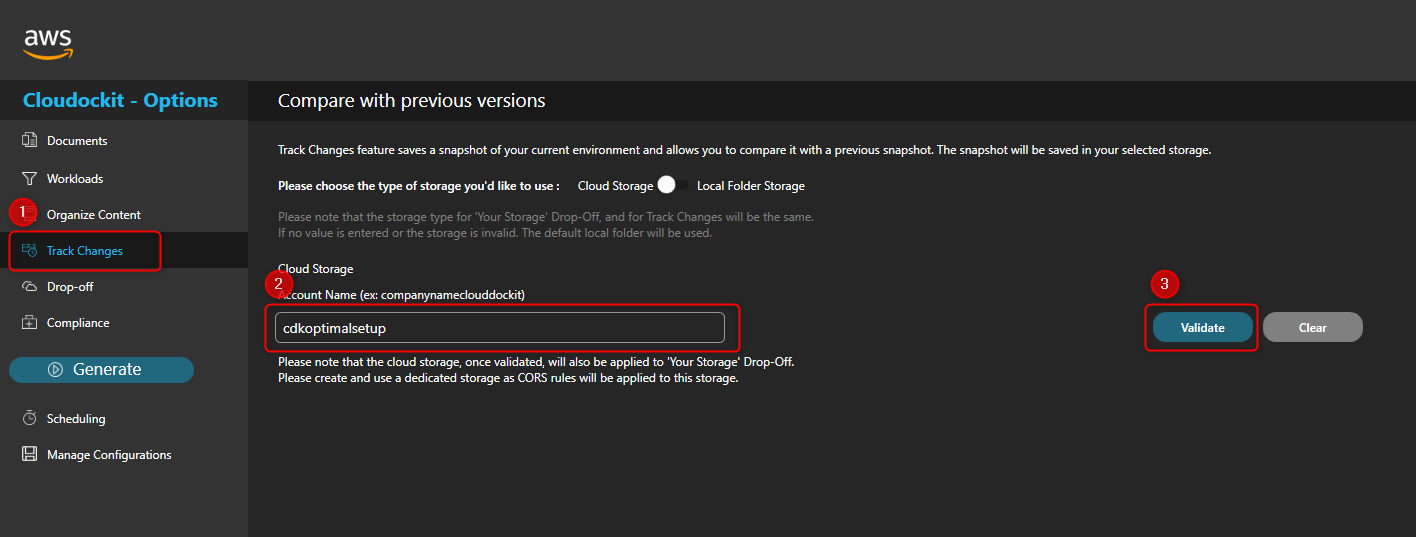
Enter the name of the bucket in the Account Name box and press validate.
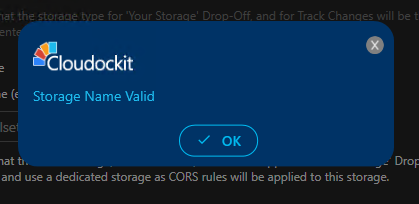
A confirmation message will display that the bucket is valid.
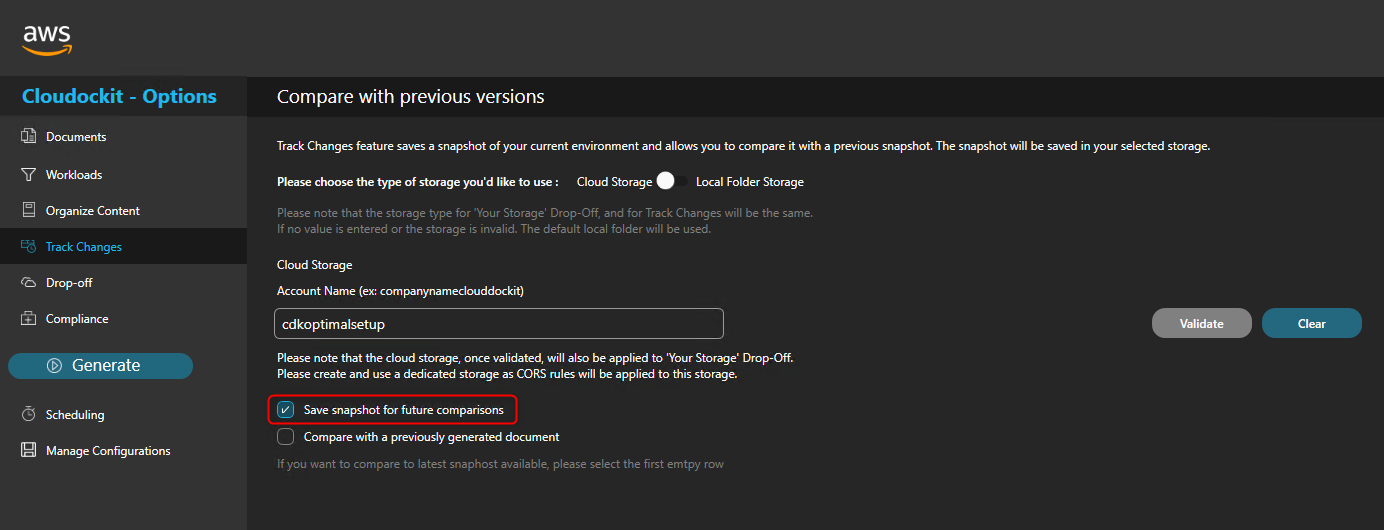
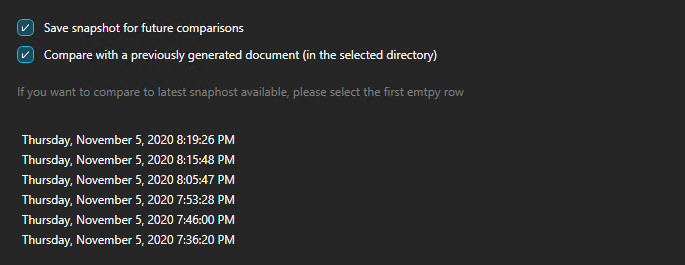
Check the box Save a snapshot for comparison.
This will save a JSON file in the storage account every time a document generation runs.
Check the box Compare with a previously generated document.
Select the first empty row that appears below.
This will always select the most recent file in the storage account to compare.
Drop-Off
In the Drop-Off settings, the same bucket as defined in the Track changes section is selected.

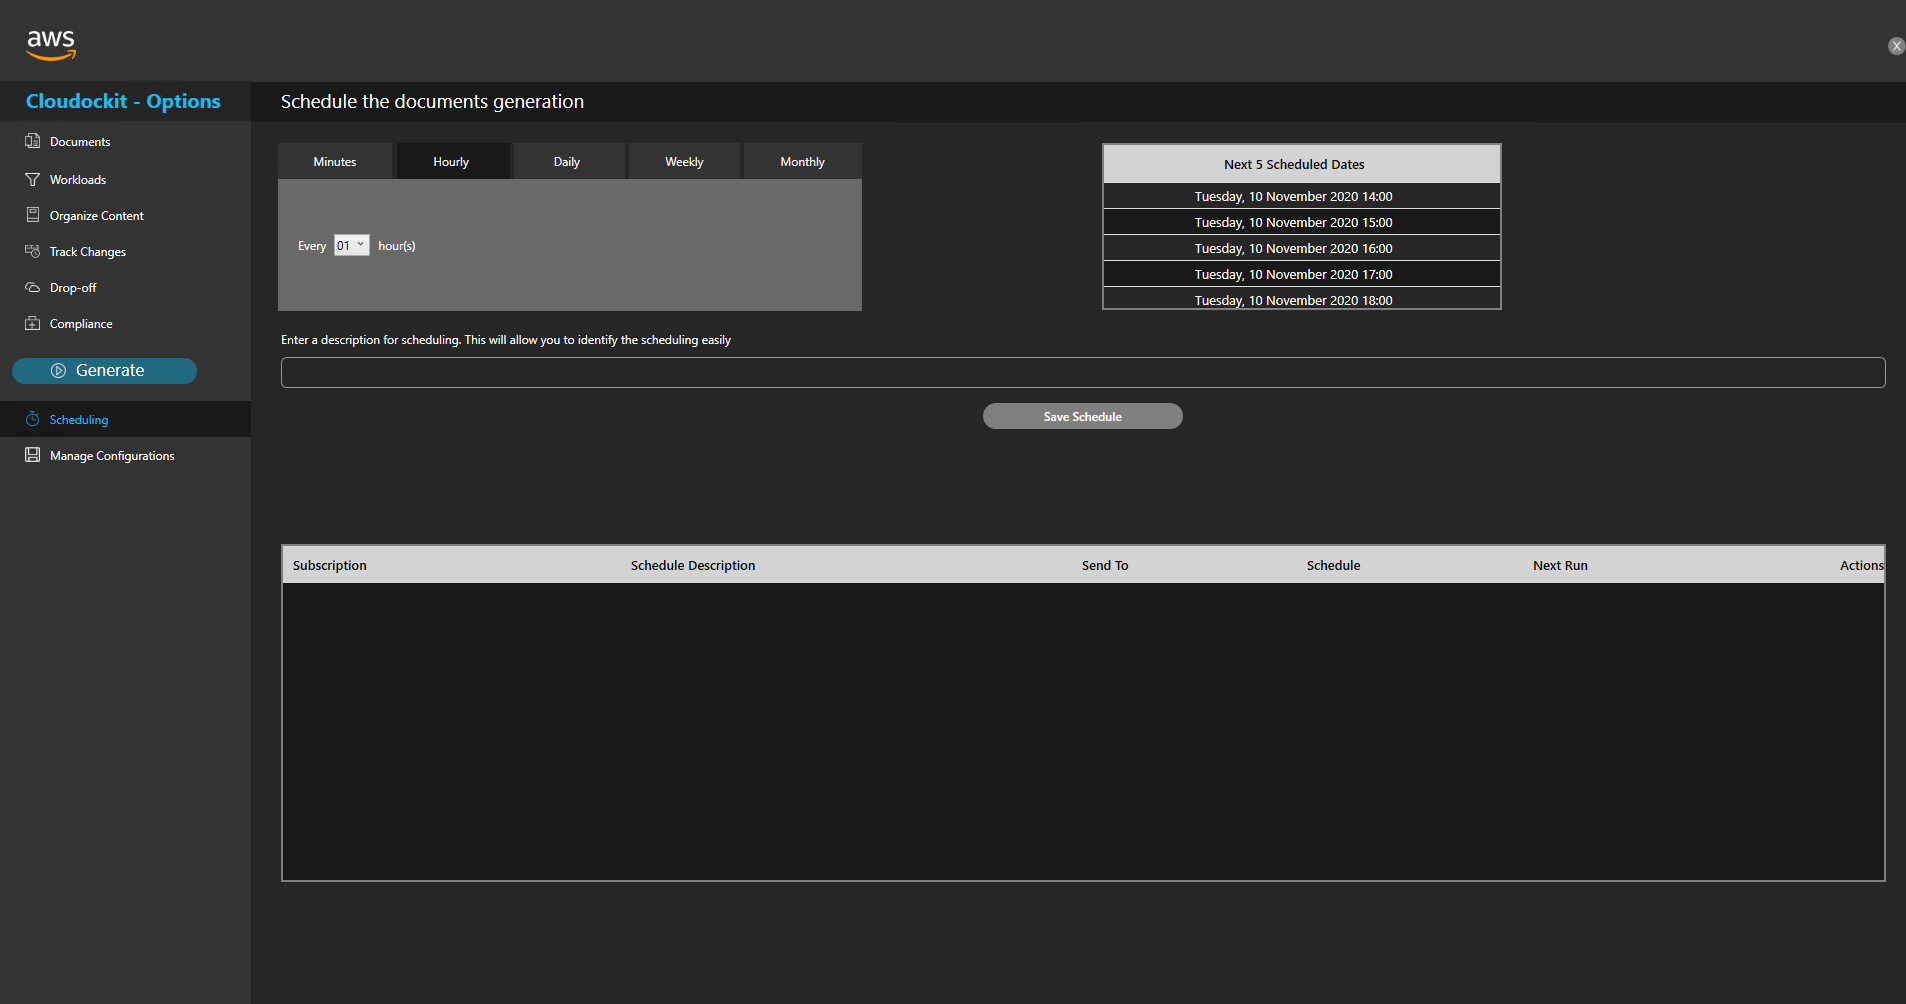
Scheduling
Define the desired schedule for your documentation to run and save your schedule.
Configuration
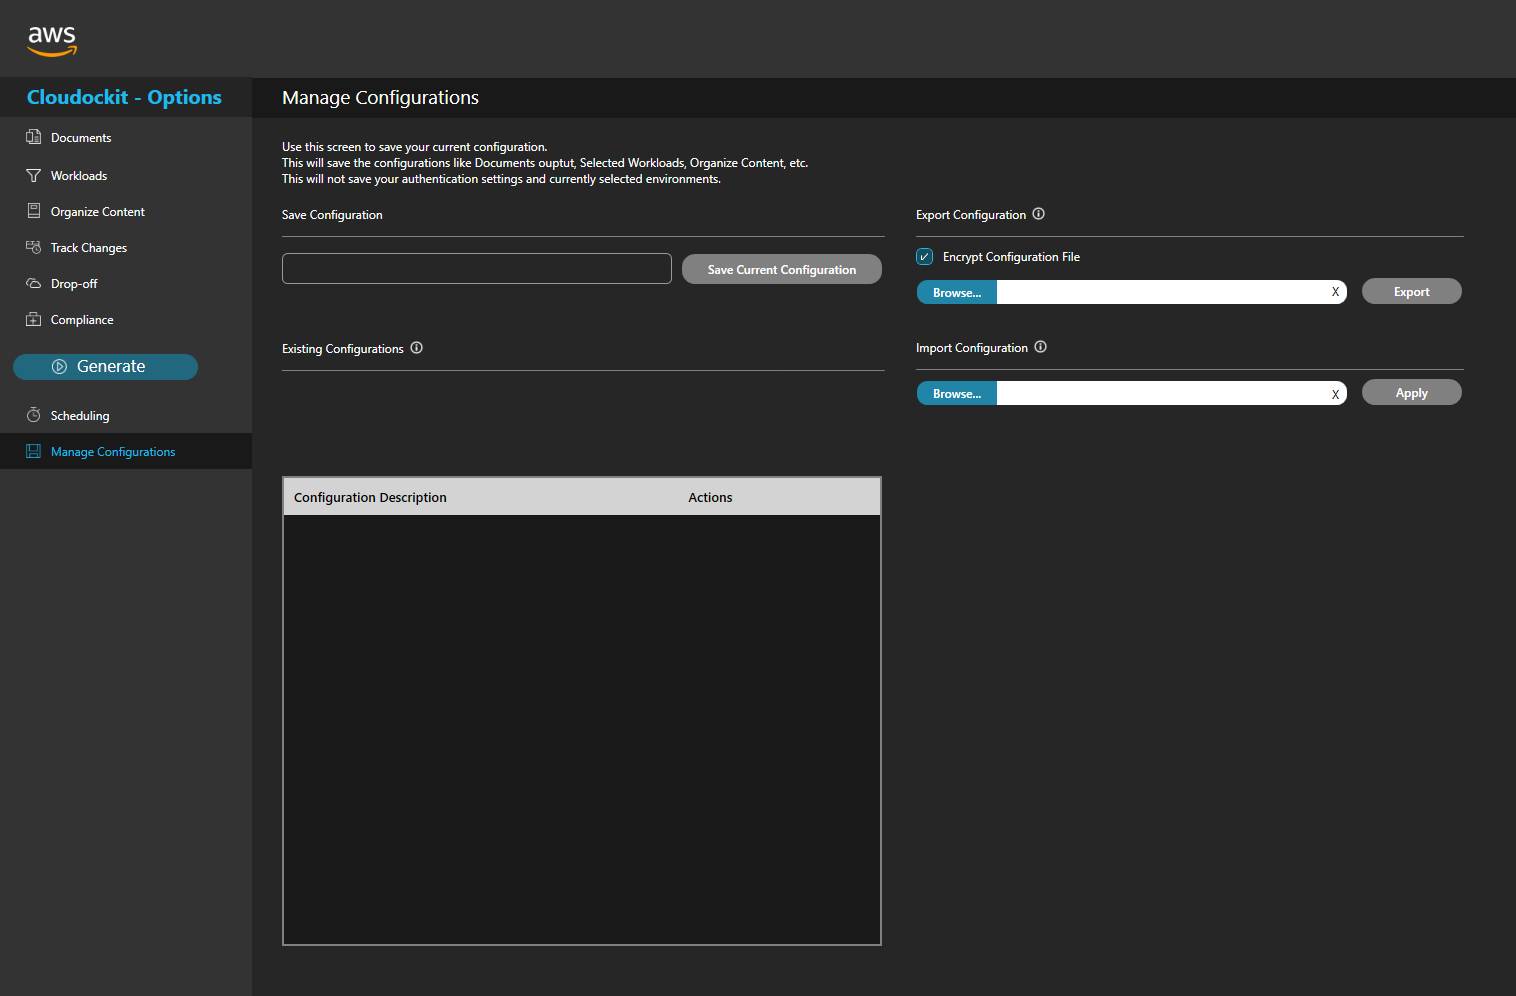
Enter a unique name in the parameters you have set and press Save Current Configuration.
Your configuration is saved, you can load or edit it in the future.
Step 9 – Validate that Documents are Successfully Generated
Once your scheduled document generation is complete, let’s validate that it has been scheduled properly.
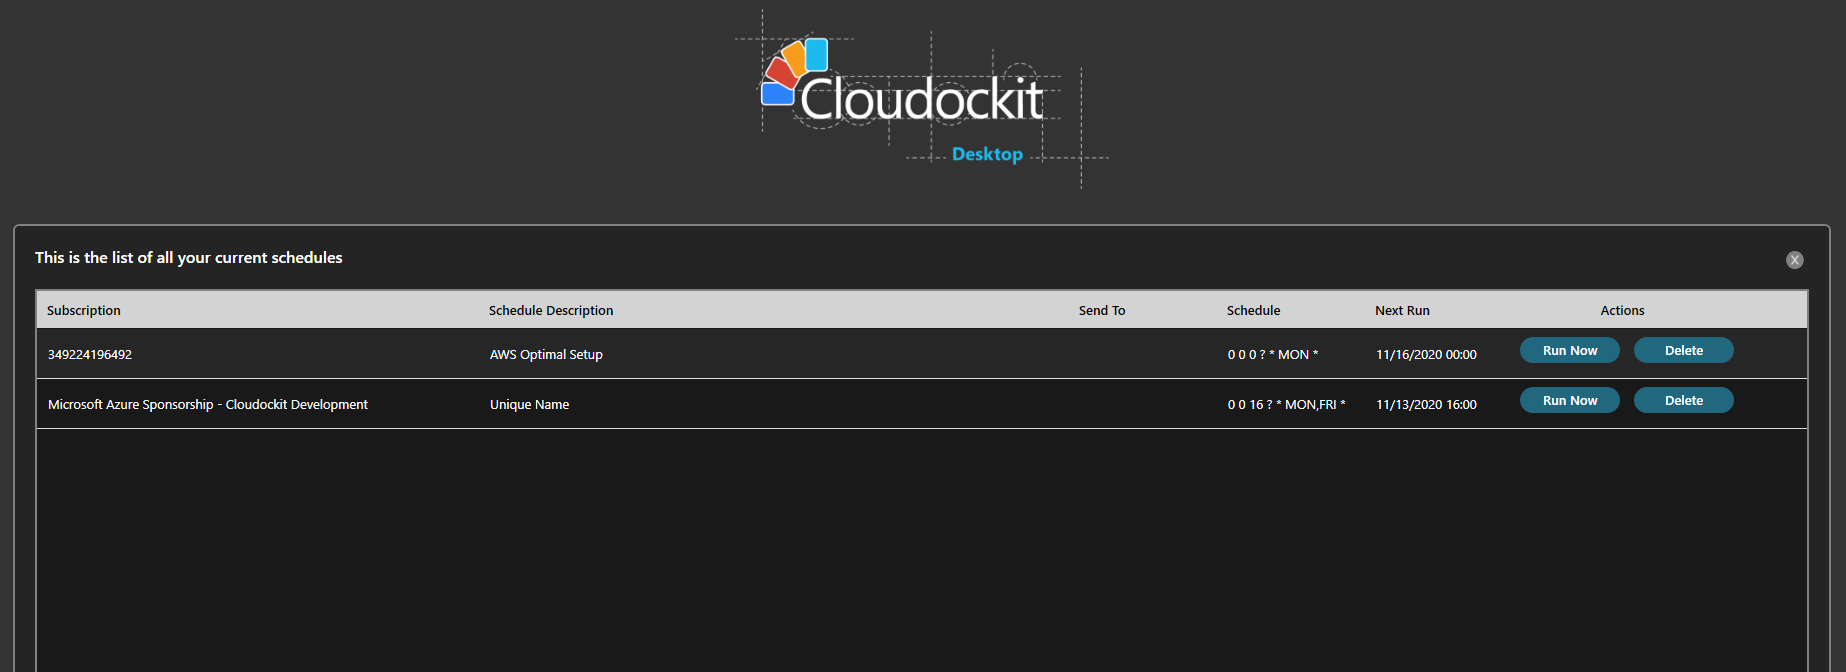
From the main menu, select View All schedules.
You will see in the list the scheduled documentation you configured.
You can press run now to generate a manual document generation or wait for the schedule to run its course.
Once your document will be completed, you will be able to access it from the Storage Account or from the desktop application.
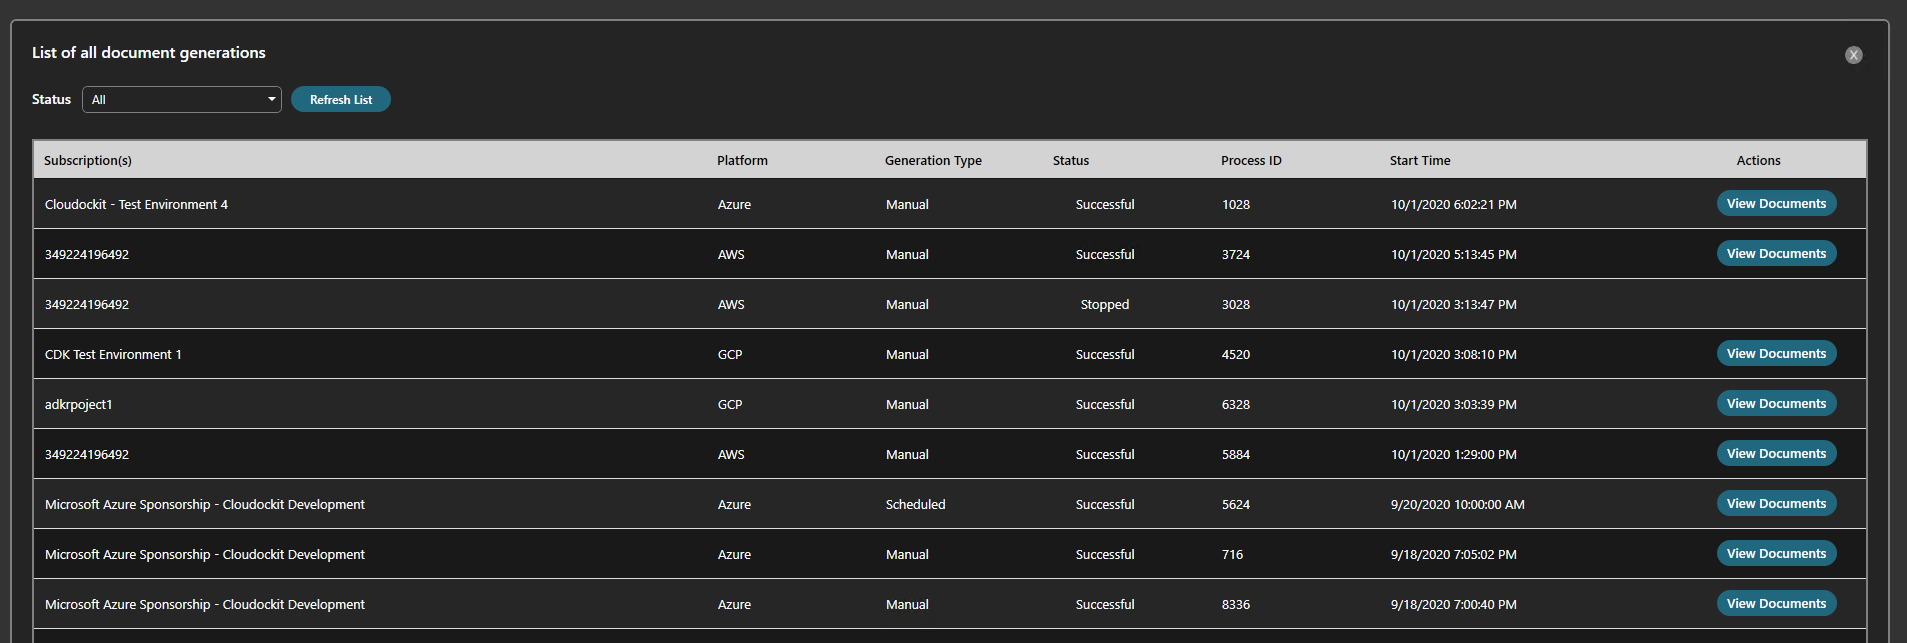
Click View all document generations from the main menu.
You have the list of all generated documents.
You can access the documents from the View Documents button on the right.
