Knowledge Base
Connect your AWS Account
Now that you are logged in Cloudockit (click here if you are not logged in yet), you can connect your AWS Account.
From the list of platforms, select AWS.
The possibilities for authentication are the following:
- IAM User – Access Keys (SaaS, Desktop, Container)
- Another user – AWS Role (SaaS)
- Cross-Account Role (Desktop)

Use Access Keys
With this method, you are using AWS Access Keys to connect your AWS Account. Here are the steps to create the required keys and log in with those keys.
STEP 1 – CREATE THE ACCESS KEYS
- Sign into the AWS Management Console and open the IAM console at https://console.aws.amazon.com/iam/
- In the navigation pane, choose Users
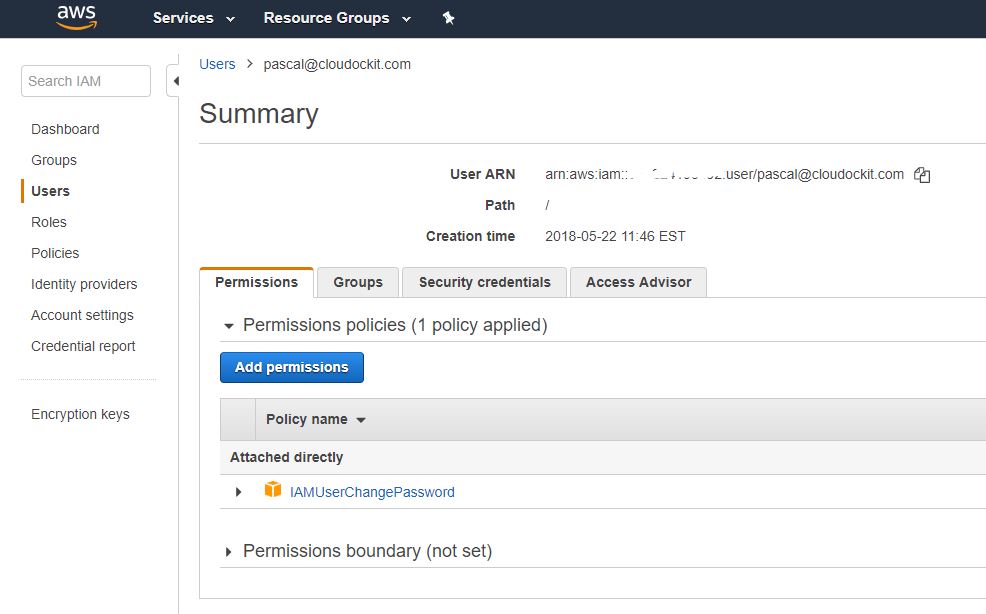
- Choose the name of the desired user, the one you want to use in Cloudockit. If you want to create a new user dedicated for Cloudockit, please refer to Create a user in AWS for Cloudockit, and then click on Security Credentials and then Create Access Keys
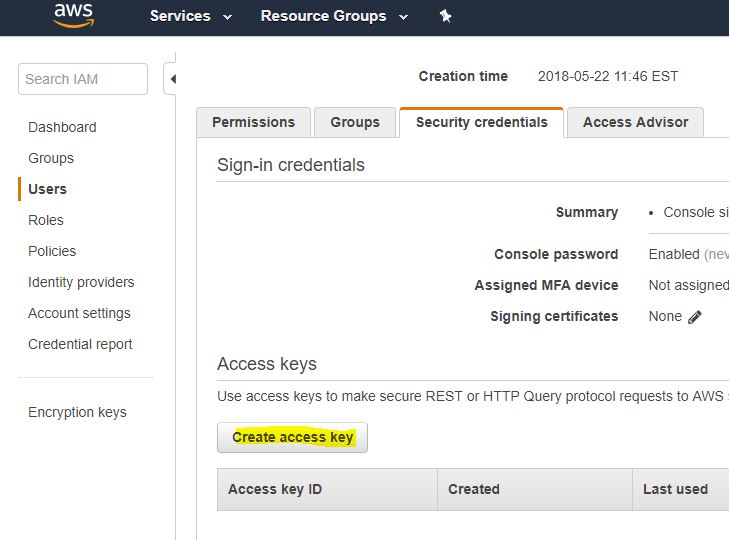
- Under Secret Access Keys, click on show. Copy the Access Key ID and the Secret Access Key. The keys will be used to connect to your AWS Account in Cloudockit
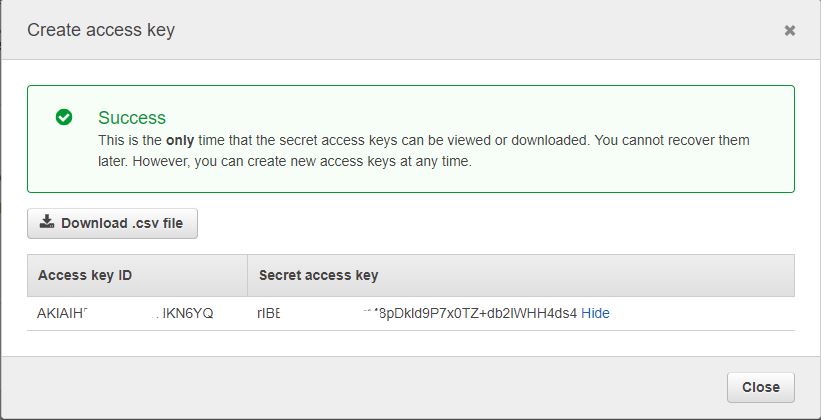
IMPORTANT: Keep the popup open since you will need the information to create the role in the AWS Console in steps 2 and 3.
STEP 2 – LOGIN TO CLOUDOCKIT
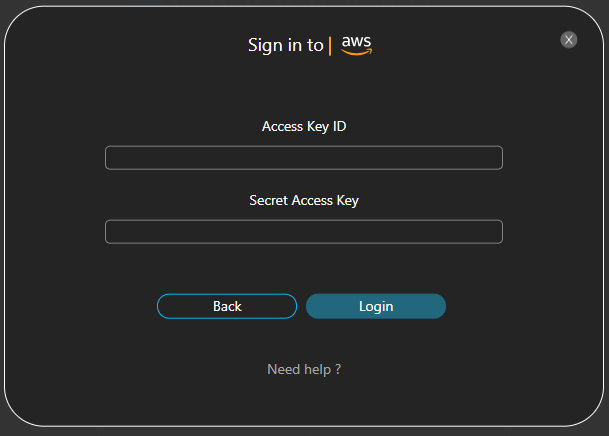
- When the AWS authentication pops up, select Use Access Keys:

- Enter the information you copied in step 1:
Another account (AWS Role)
By using this method, you will create an AWS role that will allow your Google or Amazon account to have specific privileges in your AWS Account. You will then connect to Cloudockit using that account.
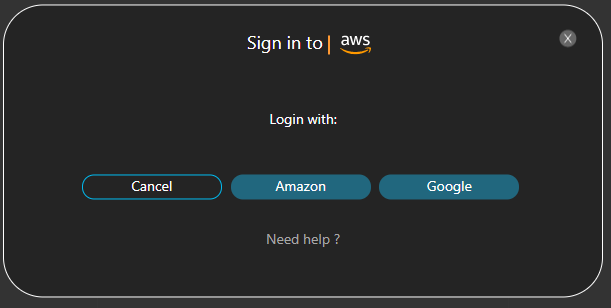
STEP 1 – LOGIN TO CLOUDOCKIT USING YOUR AMAZON OR GOOGLE ACCOUNT
- Since Amazon and Google are the ID Providers supported by Cloudockit, you will need to be logged in with Amazon or Google. If you are currently connected to Cloudockit using an AAD authentication, you will be prompted to log in using Amazon or Google
- If you are already connected using Amazon and Google you will not see the following pop-up
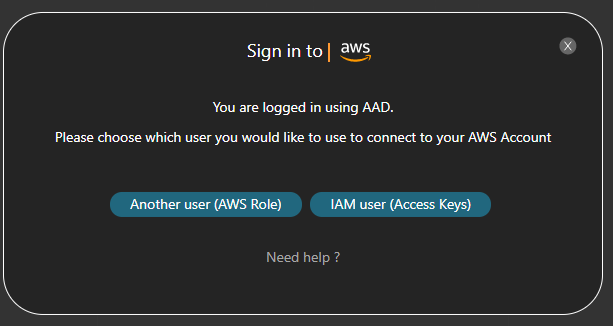
- Once connected with Amazon or Google, you will see the following pop-up. Click on Keep Going with this account:
- You will then see the detailed procedure on how to create the specific Role in AWS that will match your account with the specific provider (AWS or Google) for the Application Cloudockit:
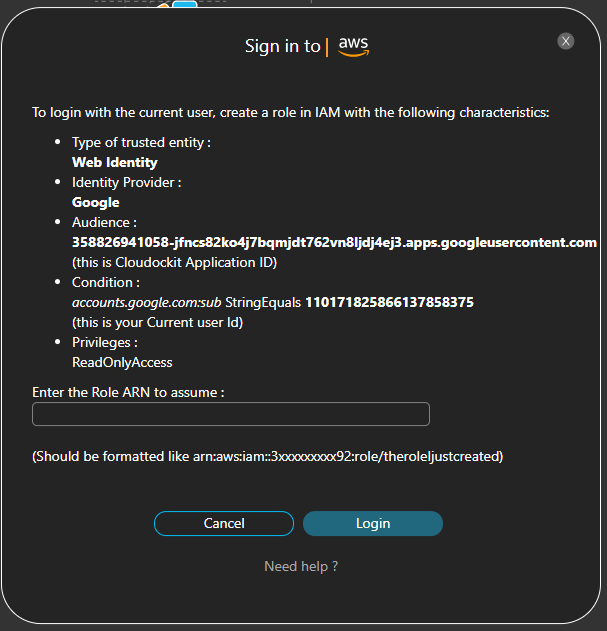
Keep the pop-up open as you will need the information to create the role in the AWS Console in step 2
STEP 2 – CREATE A ROLE (CONSOLE)
Sign in to the AWS Management Console and open the IAM console at https://console.aws.amazon.com/iam/
- In the navigation pane of the console, choose Roles and then choose Create role
- Choose the Web identity role type
- For the Identity Provider, select Login with Amazon and copy and paste the Application ID supplied below:
- Application ID: amzn1.application.689808735…. (the one from step 1 – in the pop-up)
- Click Add condition and complete required fields with the following information:
- Key: select www.amazon.com:user_id from the list
- Condition: select StringEquals from the list
- Value: amzn1.account.YourAccountID (the one from the step 1 above – in the pop-up)
- Click the Next button to continue
- To attach permissions policies, search for ReadOnlyAccess policy and select it
- Add the Cost Explorer policy to allow billing information to be retrieved. Visit AWS Troubleshooting for help
- Also, if you want to drop the document in an S3 Bucket, you will need to ensure that you have the Write privilege to this bucket. Visit AWS Troubleshooting for help
- Click Next to continue
- On the Name, review, and create page, enter Role name and click Create role
You will need to get the Role ARN that you just created.
STEP 3 – SIGN IN TO CLOUDOCKIT USING AWS ROLE
- In the Summary page of the selected role, copy the value from Role ARN field
- Go back to Cloudockit and paste the value under Enter the Role ARN to assume
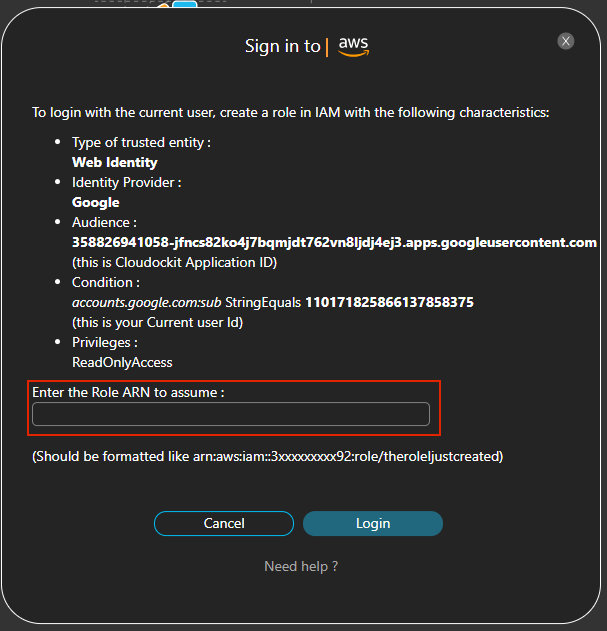
- Click on Login
You should now see the list of AWS Account(s).
Cross-Account Role
IMPORTANT: to support scanning multiple AWS Accounts, Cloudockit Desktop MUST be installed in an EC2 instance.
In order to scan multiple AWS Accounts, you will need the following 3 components:
- An IAM User and its keys to list the Accounts in the Organizational Unit (OU)
Note: you can also manually enter a list of Account IDs if you do not want to retrieve it automatically with an IAM User - An EC2 instance with the privilege to AssumeRole so that Cloudockit Desktop can Assume Roles defined in the AWS Accounts
- An AWS Cross-Account Role in each AWS Account that needs to be scanned. The name of this Cross-Account Role needs to be the same in all AWS Accounts.
Here are more details on how to create those components.
IAM USER
This IAM User will be used to list all the accounts in the organization so that Cloudockit Desktop can loop through the accounts and then Assume Roles for each.
To Create this IAM User, follow these steps:
- Login to IAM Console
- Click on User and then Add User
- In the User name field, enter CloudockitMultiAccountScan (or any name that follows your naming convention)
- In access type, select Programmatic Access
- Click Permissions
- Click on Attach existing policies directly
- Click on Create Policy. This will open a new tab to create a new policy
- In Service, select Organizations
- In action, select Access Level / ListAccounts and ListAccountsForParent
- In Resources, select All resources
- Click Review Policy
- In Name enter CloudockitMultiAccountScanPolicy and click on Create Policy
- Close the tab that was opened to create the new policy
- Come back to the user and refresh your browser
- In the search box, enter CloudockitMultiAccountScanPolicy, click the checkbox to select it and then click on Tags, then Review and finally click on Create User
Once the role is created, you need to retrieve the Access Key / Secret Key.
Select Users and choose CloudockitMultiAccountScan. Click on Security Credentials and then click on Create Access Key. Save the Access Key ID and Secret Access Key.
EC2 INSTANCE
Before creating the EC2 Instance, let’s create the Policies and Role required for the EC2 Instance.
Follow these steps:
- Create a Policy named CloudockitAssumeRole (or any convention you have)
- Click on Policies
- Click on Create Policy
- Click on JSON and enter the JSON Definition below
- Click on Review Policy
- In the name, enter CloudockitAssumeRole
{
  "Version": "2012-10-17",
  "Statement": {
    "Effect": "Allow",
    "Action": "sts:AssumeRole",
    "Resource": "*"
  }
}- Create a role named CloudockitEC2RoleCrossAccount (or any convention you have)
- Click on Roles
- Click on Create role
- In Select type of trusted entity, select AWS Service
- In Choose the service that will use this role, select EC2
- Click on Permissions
- Attach the two following policies to this Role:
- ReadOnlyAccess
- CloudockitAssumeRole
- Click on Tags and Review and then enter CloudockitEC2RoleCrossAccount in the name and click Create Role
Now, we are ready to create the EC2 Instance where you will install Cloudockit Desktop. This EC2 instance will assume all the Roles in all the AWS Accounts.
Follow these steps to create the EC2 Instance:
- From the EC2 Console, click on Launch Instance. Select Windows Server 2019 Base, take the 64 bit edition for the Image.
- In the step 2, choose an instance type, select t2.large. Click Next for the instance details.
- In IAM Role, select the role CloudockitEC2RoleCrossAccount that you have created before.
- Then click Review and Launch.
- Login to the EC2 Instance and install Cloudockit Desktop
AWS CROSS-ACCOUNT ROLES
In each AWS Account, you want to scan, you need to create a role named CloudockitScanRole (or any name that you prefer).
Here are the steps to create this role:
- From IAM console, click on Roles and then Create role.
- Select Another AWS Account. Enter the Account ID where you are installing the EC2 instance that will run Cloudockit Desktop.
- Click Next and select the ReadOnlyAccess permission.
- Click Review
- Enter the name CloudockitScanRole
- Click on Create role
- Repeat those steps in all AWS Accounts
Permissions and Privileges
GENERAL DOCUMENTATION
Generating documentation with Cloudockit only requires a ReadOnlyAccess at the account level.
DROP-OFF
To drop off documentation in the storage account, the credentials used to generate the documentation must have the following policy:
{
  "Version": "2012-10-17",
  "Statement": [
    {
      "Effect": "Allow",
      "Action": ["s3:*"],
      "Resource": ["arn:aws:s3:::YOURS3Bucket"]
    }
  ]
}
AWS TRUSTED ADVISOR
To read information from the AWS Trusted Advisor, the credentials used to generate the documentation must have the following policy:
{
  "Version": "2012-10-17",
  "Statement": [
    {
      "Effect": "Allow",
      "Action": ["ce:Get*", "ce:List*", "ce:Describe*"],
      "Resource": ["*"]
    }
  ]
}
AWS ORGANIZATIONS
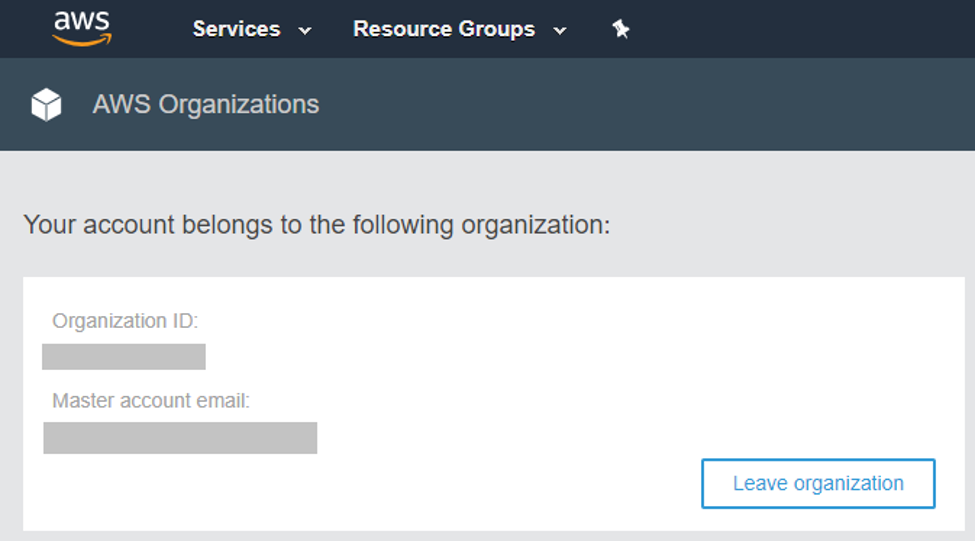
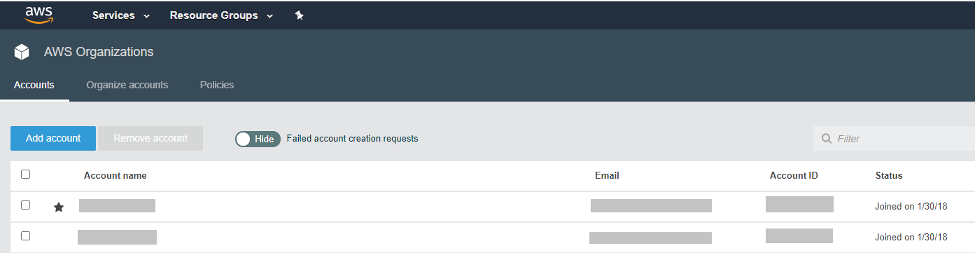
If you want to view details of the accounts of your organization in your generated documents, you will need to choose an AWS master account when logging on Cloudockit website.
ORGANIZATIONAL UNITS AND ACCOUNTS
If you want to view details of the organizational units and accounts in your generated documents, you will need to choose an AWS master account when logging on Cloudockit website.

MEMBER ACCOUNT
When you choose an AWS member account, the generated documents will display the information of your organization and minimum information of your account (e.g.: Id, ARN).