

Knowledge Base
Cloudockit Advanced Administration Panel
Please note that this panel is only available to newly created Commercial licenses.
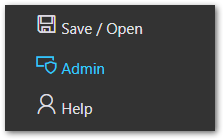
To open the administration panel, click on the Admin option in the main menu.
Sections
There is usually only one section: Configurations.
The Advanced version shows 2 additional sections: Users, Blacklisted Users.
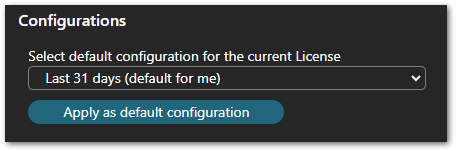
Configurations (default)
This section lets an administrator setup the default configuration to be uploaded when a user starts Cloudockit.
Users (advanced)
The users section appears as follows:

On the right side, the Product Key being managed is shown in a dropdown:
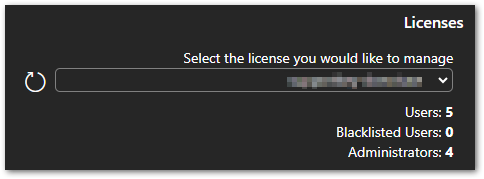
The dropdown will show all Product Keys the currently logged in user manages.
Legend
1. Field to enter the email address of users to be added as administrators; user has not necessarily logged in with the selected Product Key;
2. Field to search the users by email address;
3. Dropdown to show only Administrators or Users;
4. Click this icon to black list the corresponding User;
5. Click this icon to remove the corresponding User; Users will be able to login again with the Product Key as long as they are not blacklisted;
6. Shows the role; currently logged in Admin cannot remove self from Product Key
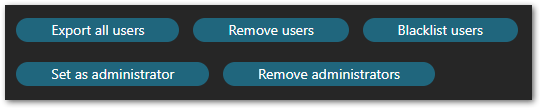
Some group actions can be performed on several users:
Blacklisted Users (advanced)
The Blacklisted Users section appears as follows:
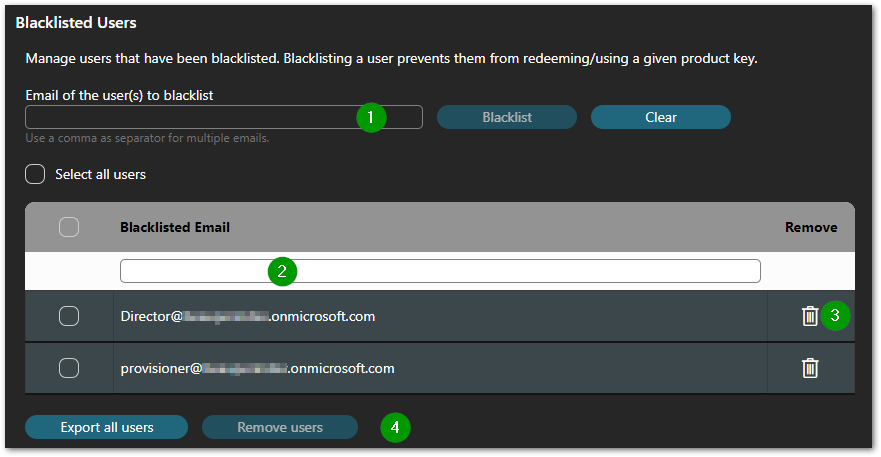
Legend
1. Field to enter the email address of users to be blacklisted; user has not necessarily logged in with the selected Product Key;
2. Field to search the users by email address;
3. Remove a User from the Blacklist; removed Users can then log in again with the selected Product Key;
4. Bulk actions buttons