

Knowledge Base
Compliance Rules
While Cloudockit generates reports, it also evaluates a set of built-in Compliance Rules, your own custom Compliance Rules to ensure a perfect set-up and also monitors all of your environments.
Examples of compliance rules used in Cloudockit:
- Your web sites are not backed up
- Virtual Machines are opened without port restrictions
- Default names like default1, default2 are active
You do not need to configure anything in your cloud environment to enjoy the compliance rules feature. No agent and no write permissions are required, just access to your environment using read-only access and Cloudockit will automatically validate the rules.
Our compliance rule engine allows you to create your own set of rules using a WYSIWIG interface with AND/OR logic and nested grouping. It also shows you human-readable properties instead of cryptic developer properties name.
Select the Compliance Rules to apply
You can choose the Compliance Rules that you want to check by selecting the Compliance Rules tab in Cloudockit Settings:
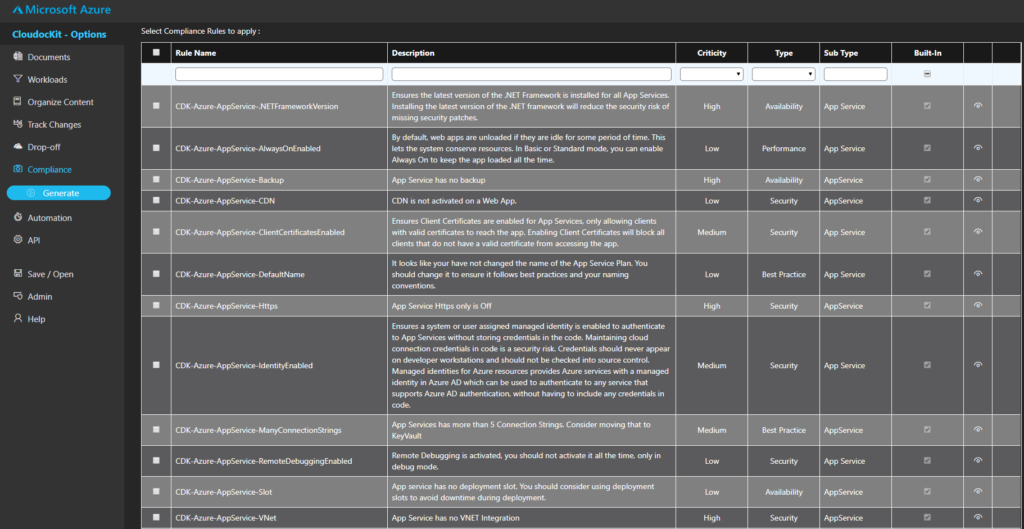
You also have the option to select All Compliance Rules which will include the current and future rules automatically.
There are 3 types of Compliance Rules in Cloudockit
- Your own compliance rules:
- You can create your own Compliance Rules using a GUI. Refer to the following section for more details.
- Cloudockit’s Built-in Rules:
- Cloudockit natively provides many rules to check the standard best practices for Security, Availability …
- You can filter those rules using the built-in column in the list of rules
- Note: Cloudockit built-in Rules are of two different types:
- The built-in Rules in Cloudockit’s UI: You can see that there is an eye in the row. When you click on it, the rule definition will be displayed
- The Rule that is using server-side code that are custom developed: You cannot see the definition for those rules.
- Third-Party Rules Extraction
- Cloudockit can extract rules from the rules that are natively implemented by the Cloud Providers:
- Azure Security Center
- AWS Advisor (Cf. AWS Troubleshooting article for requirements)
- GCP Security Command Center (Cf. GCP Troubleshooting article for requirements)
- When you select those rules, Cloudockit will automatically call the APIs to retrieve all the rule definitions from the providers and get the rules that are not respected. Cf. below for more details.
- Cloudockit can extract rules from the rules that are natively implemented by the Cloud Providers:
Create your own rule
Under the list of all rules, you can click on the New Rule button to create a new Compliance Rule:
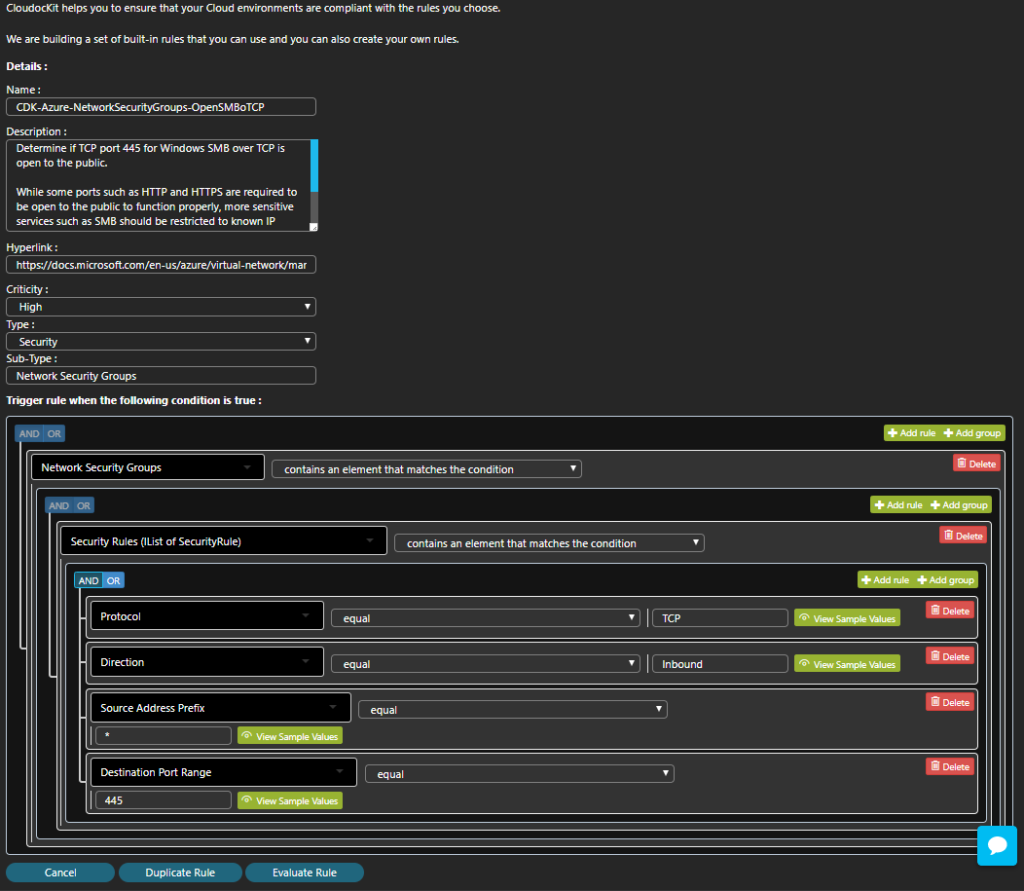
The creation of the Compliance Rule is split into two sections:
- First, you specify the metadata like the Name, Description, Severity… then you can also specify a Sub-Type field that you can use as you want.
- Second, you specify how the rule should be triggered. The UI allows you to implement complex rules using the nested group and boolean AND/OR condition.
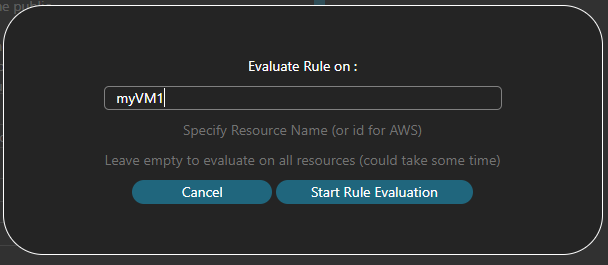
When you think your rule is good, you can click on Evaluate Rule and Cloudockit will ask you if you want to evaluate on a specific resource:
You also have the ability to View Sample values of fields when you are not sure about what to enter (like the state of a Virtual Machine, is it Up or 1 or started?)
Manage your rules
Cloudockit gives you the following features to manage your compliance rules:
- Export Rules: download a .json file of the rules that you have selected
- Import Rules: from the .json file you have exported, you can do the re-import
- Duplicate Rule: take an existing rule and copy it
- View .csv of all Rules: you will get a csv with all the rules available
Compliance Rules output
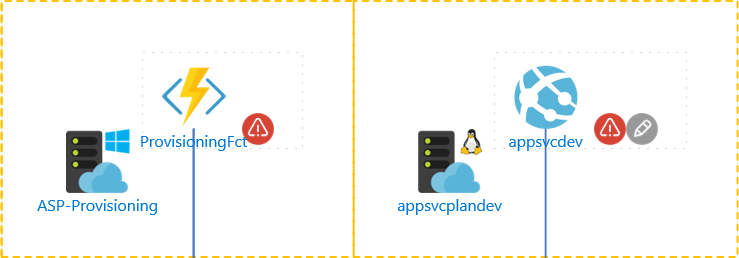
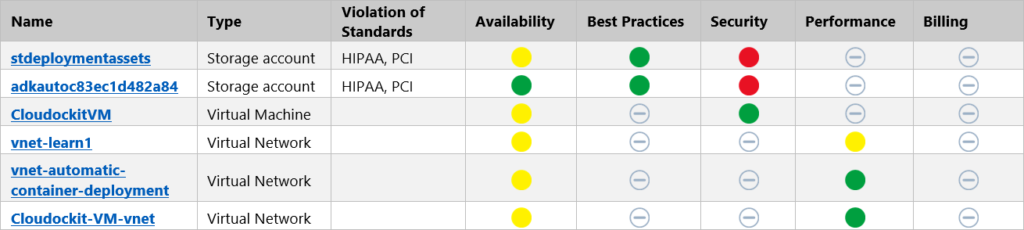
Now you have specified the rules, how can you see the end result:
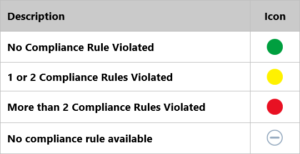
- Diagrams show a red flag. When you click on it you can see what’s wrong in the Shape data panel
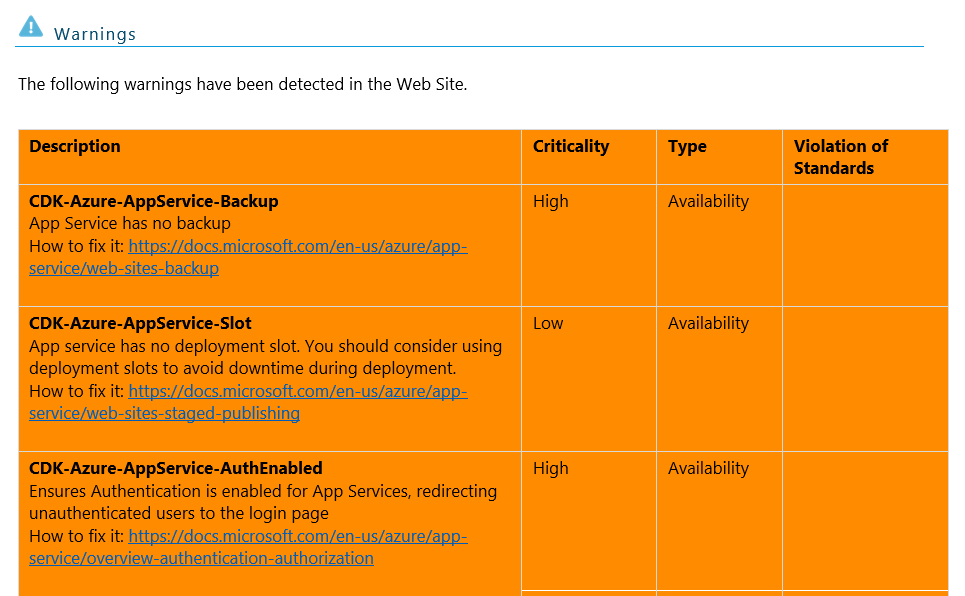
- Word/PDF contains a table of warnings for each object and also a summary of what is wrong

- Excel files contain all warnings in a dedicated tab
- JSON files contain a Warning collection for each object