

Knowledge Base
Connect your Azure Subscription
Now that you are logged-in to Cloudockit (click here if it’s not the case), you can connect to your Azure Subscription.
From the list of platforms, select Azure.
You will be prompted with multiple options to connect to your Azure subscription. Please note that the list of options depends on the identity provider you have chosen when you logged into Cloudockit.
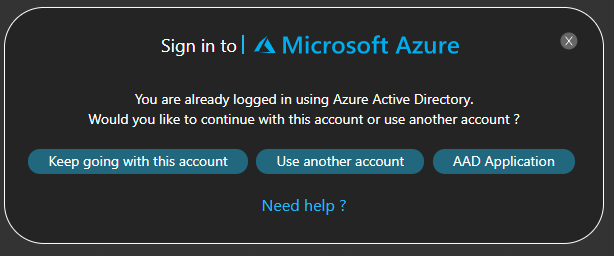
Connection Options
Keep going with this account: (SaaS, Container)
- Choose this option if you want to continue with your Azure Active Directory account
- Do not choose this option for Azure Government, China or Germany
- This option will display only if you are already connected using Azure Active Directory
Use another account (SaaS)
- Choose this option if you want to use another Azure Active Directory account
- Typically, if you are a consultant you may want to use an account provided by your client
- Do not choose this option for Azure Government, China or Germany
- This option will display only if you are already connected to Azure Active Directory
Log in with Azure Active Directory (SaaS)
- This option will display only if you are not already connected using the Azure Active Directory
- Enter the tenant’s name of the Azure Active Directory. Remember that the tenant’s name and the account you are using need to be linked to at least one Azure Subscription. Click here for more information on how to find your tenant’s name.
AAD Application (SaaS, Desktop, Container) – see below for instructions
- Choose this option if you want to connect to your Azure Subscription using an AAD Application (also called Service Principal) instead of your own identity
- Choose this option for Azure Government, China, Germany or Public
Managed Identity (Desktop) – see below for instructions
- Choose this option if you want to connect to your Azure Subscription with Managed Identity.
- You will need to enable managed identity on the virtual machine where Cloudockit is installed and grant that virtual machine reading privileges on the subscription you want to document. Click here if you want to set this up.
Once connected, you should see the list of Subscriptions you have access to. If you do not see any subscription, please click here for help.
Creating an AAD Application
This is a 2 step procedure:
- Step 1: Create the AAD Application
- Step 2: Give the AAD Application the appropriate permissions
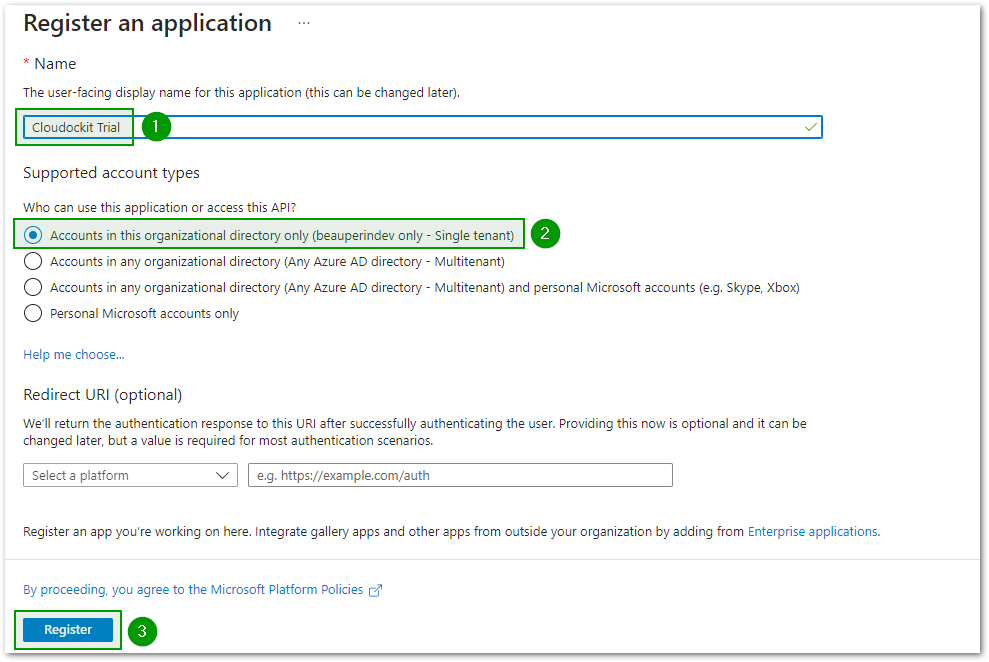
STEP 1: CREATE THE AAD APPLICATION
Navigate to https://portal.azure.com and click on the Azure Active Directory icon:
Select App Registration
Click New Registration
- Name: App Registration Name of your choice
- Supported account types: Accounts in this organizational directory only
Click Register
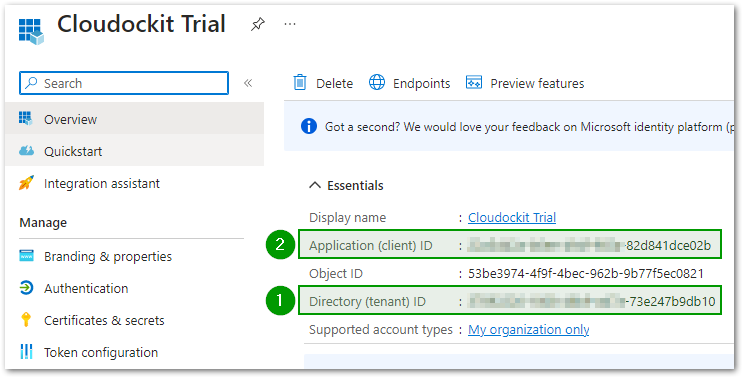
Once the application has been created, take note of the following values:
- Directory (tenant) ID
- Application (client) ID
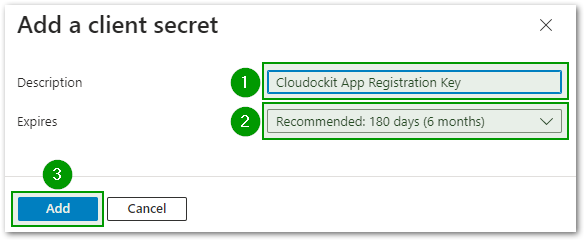
Click Certificates & secrets then click New client secret
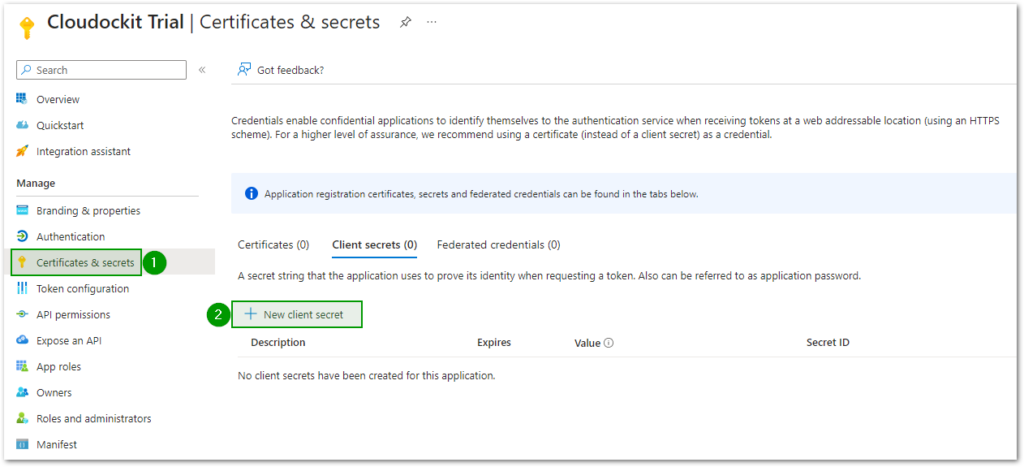
Fill in the following fields
- Description: Enter the description of your choice
- Expires: Choose the expiration of your choice
Click Add
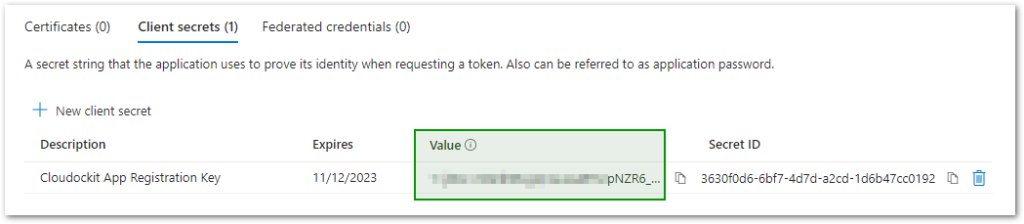
Copy and paste the Secret value. Keep it safe with the Directory ID and Application ID.
Note: This value is only visible right after its creation, you will have to create a new one if you have not saved it.
STEP 2: GIVE THE AAD APPLICATION THE APPROPRIATE PERMISSIONS
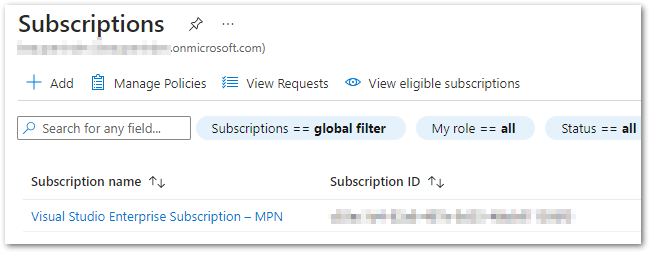
From the Azure Portal go to Subscriptions.
Select the subscription of your choice
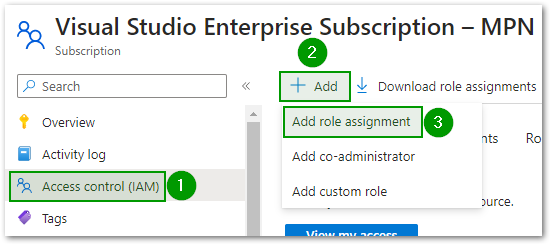
Select Access Control (IAM)
Click Add
Select Add role assignment
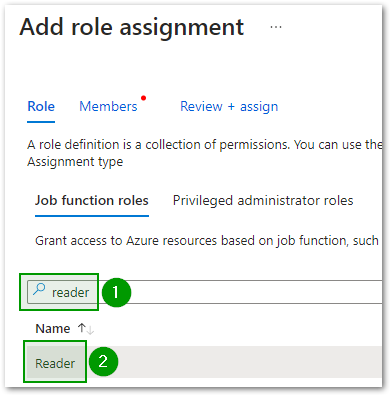
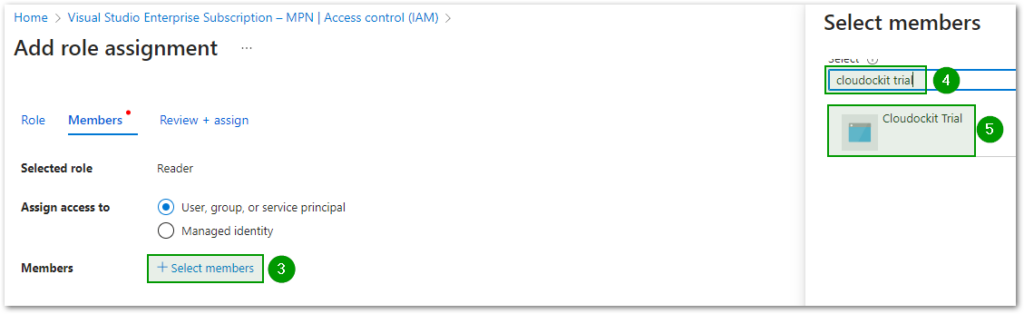
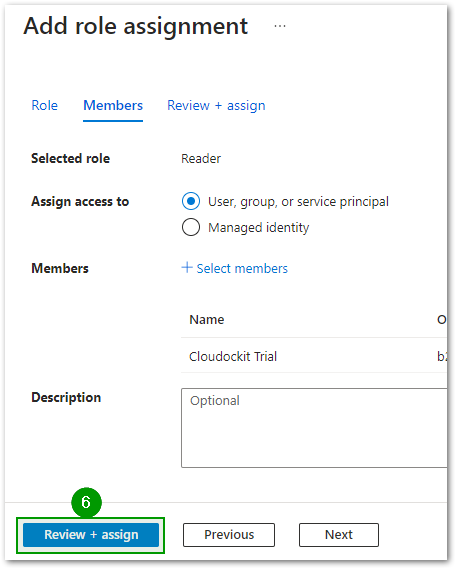
Fill in the following fields
- Role: Reader
- Enter the name of the app registration in the search box. Select it from the list below until it is added to the selected members section.
Click Review + assign
Activating Managed Identity
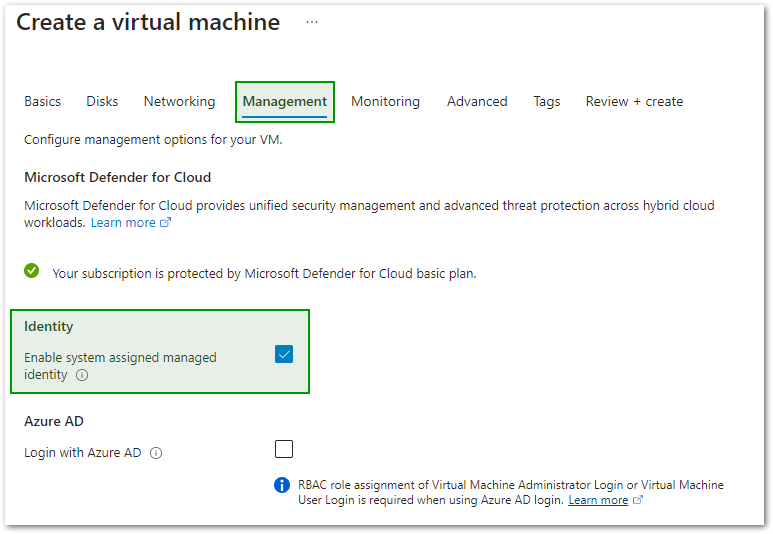
ENABLING MANAGED IDENTITY WHEN CREATING A VIRTUAL MACHINE
When creating a new virtual machine, under Identity in the Management tab, check the box Enable system assigned managed identity.
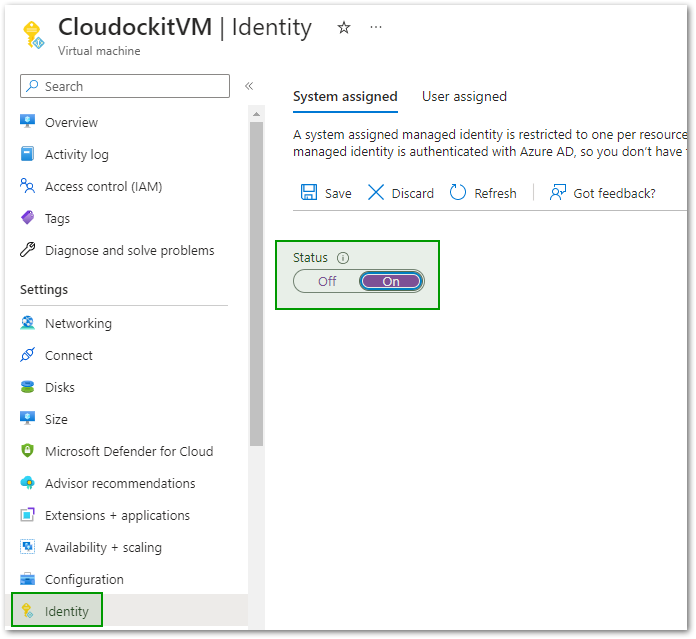
ENABLE MANAGED IDENTITY ON A VIRTUAL MACHINE
Open the Azure portal and select the virtual machine.
Permissions and Privileges
Visit the following page: Which Permissions are Needed to Generate Documentation with Cloudockit