Knowledge Base
Drop-off in SharePoint Online/Teams
The purpose of this document is to provide the detailed steps to configure SharePoint Online as a drop-off location for your Cloudockit documentation on the SaaS or the Desktop version. Many organizations find value in dropping their documentation on SharePoint. Their employees already have access to SharePoint which makes it easy for them to consume the documentation. Dropping in SharePoint Online means the documentation can be easily accessible via Teams as well.
Client secrets for SharePoint Add-ins that are registered by using the AppRegNew.aspx page expire after one year. Click here to learn how to replace an expiring client secret in a SharePoint Add-in.
Identifying the SharePoint Site
The first step is to identify the SharePoint site where you want to drop your documents.
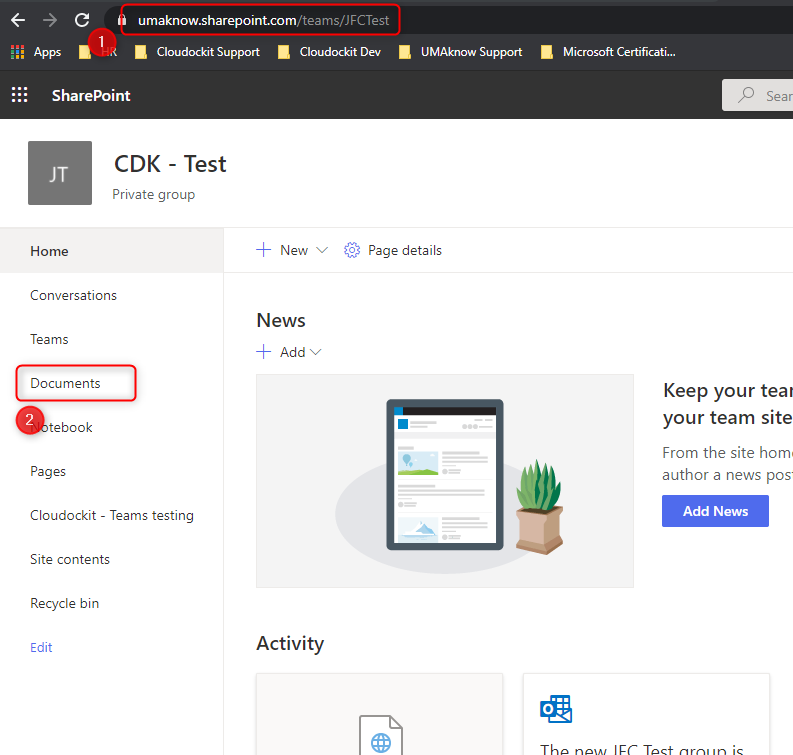
The site we are using for this example is https://umaknow.sharepoint.com/teams/JFCTest.
Cloudockit can drop files at the root of the library or in a specific folder that you’ll specify later (explained below).
Click on Documents on the left menu.
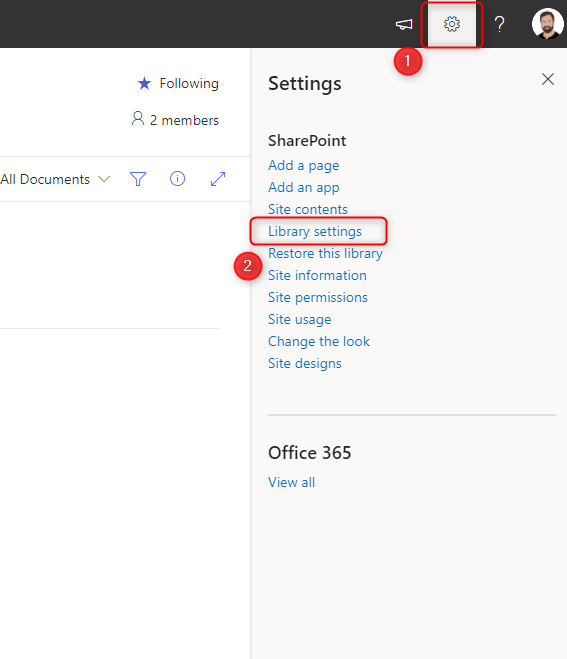
Once the site page has loaded, click the gear icon in the upper right corner and select Library Settings.
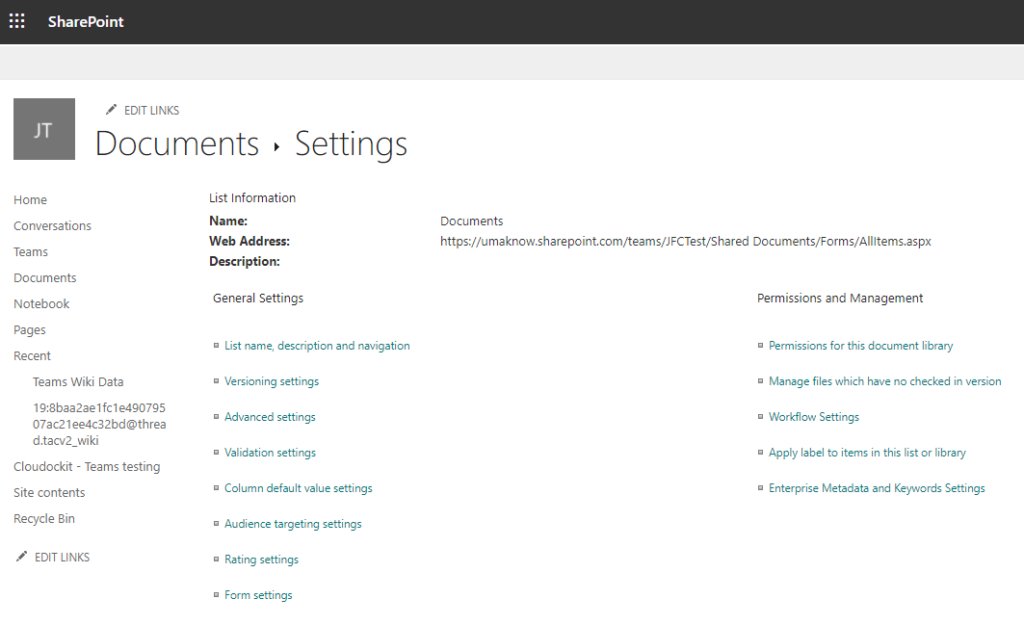
You’ll want to identify and keep the following information:
Web Address: https://umaknow.sharepoint.com/teams/JFCTest
Creating a Service Account
In this step, we will create a service account and give it write permissions on the SharePoint site so that documents, generated using Cloudockit, can be dropped on the site.
From your SharePoint site, change the end of the URL by adding “_layouts/15/AppRegNew.aspx”.
In our example the URL will be: https://umaknow.sharepoint.com/teams/JFCTest/_layouts/15/AppRegNew.aspx
Important: you may get a message indicating the following:

If this happens, check out this Microsoft Help page: https://learn.microsoft.com/en-us/sharepoint/troubleshoot/apps/cannot-register-app-update-permissions
Fill out the fields to create your service account:
- Title: e.g. CDK SharePoint Drop-off, or any title you prefer
- App Domain: This attribute needs to have a value but is not used, e.g. www.localhost.com
- Redirect URL: This attribute needs to have a value but is not used, e.g. https://www.localhost.com
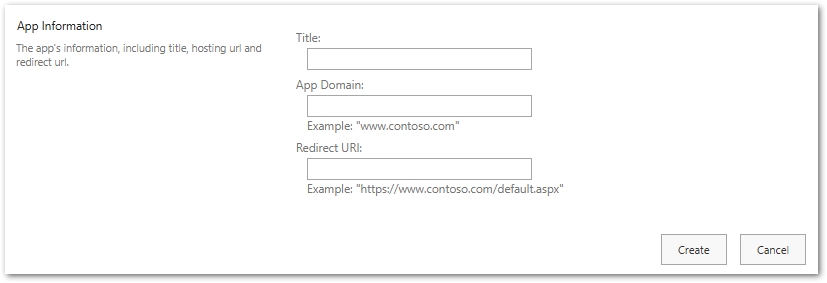
Once all values are entered, click the Create button in the lower right corner.
You will get a message confirming the Service Account information.
Keep this information in a safe place. We will use it to configure the SharePoint Online drop-off.
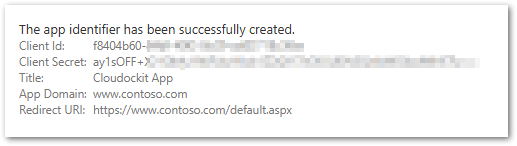
Click OK
Giving the Service Account Privileges
Now that the service account is created, give it privileges to drop documents from Cloudockit.
From your SharePoint site, change the end of the URL adding “_layouts/15/appinv.aspx”
For this example the URL of our site is https://umaknow.sharepoint.com/teams/JFCTest/_layouts/15/Appinv.aspx
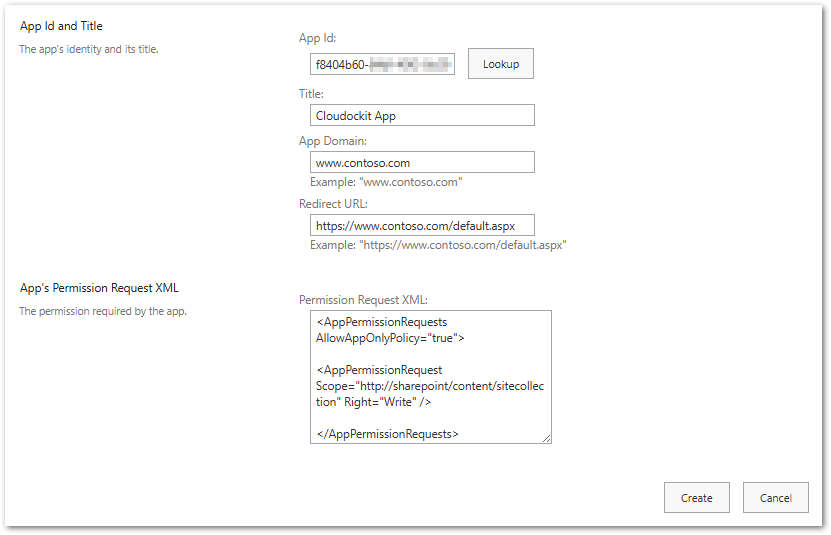
Paste the Client ID value created in the previous step in the App Id field and click Lookup.

This will load all of the information of the service account previously created.
Copy this XML (Do not change anything !) and paste it in the Permissions Request XML field.
<AppPermissionRequests AllowAppOnlyPolicy="true">

<AppPermissionRequest Scope="http://sharepoint/content/sitecollection" Right="Write" />

</AppPermissionRequests>
Confirm the information is accurate and click the Create button in the lower right corner.
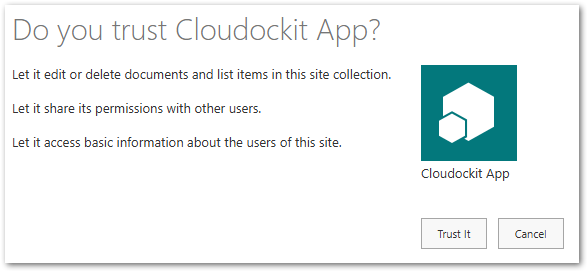
Click the Trust it button.
Configuration of the Drop-off
Connect to Cloudockit and select the platform of your choice.
Select Drop-Off from the left menu.
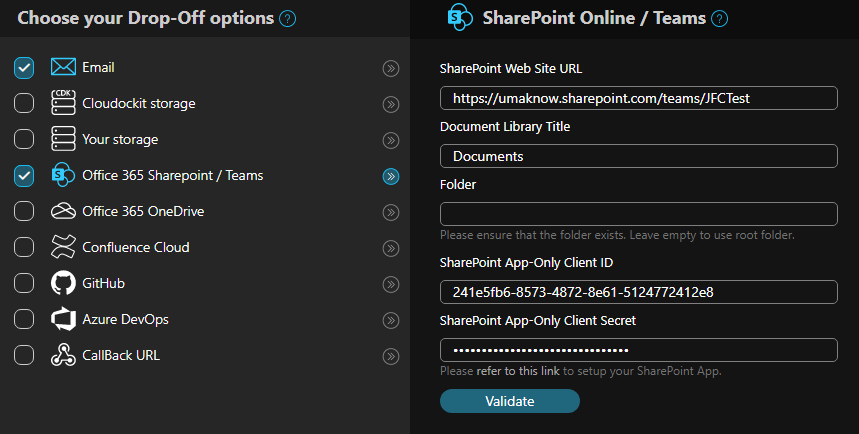
Check Office 365 SharePoint / Teams
Make sure to uncheck any other Drop-Off option that you do not need.
Fill in the fields:
- SharePoint Web Site URL: https://umaknow.sharepoint.com/teams/JFCTest (the web address of the site)
- Document Library Title: Documents
- Folder: in case you want the documents to be dropped in a folder that must already exist, you can specify its name here
- SharePoint App-Only Client ID: 241e5fb6-8573-4872-8e61-5124772412e8 (Client Id of your service account)
- SharePoint App-Only Client Secret: wY8**************************** (Client Secret of your service account)
Click Validate
A message will display confirming the connection to SharePoint Online was successful.
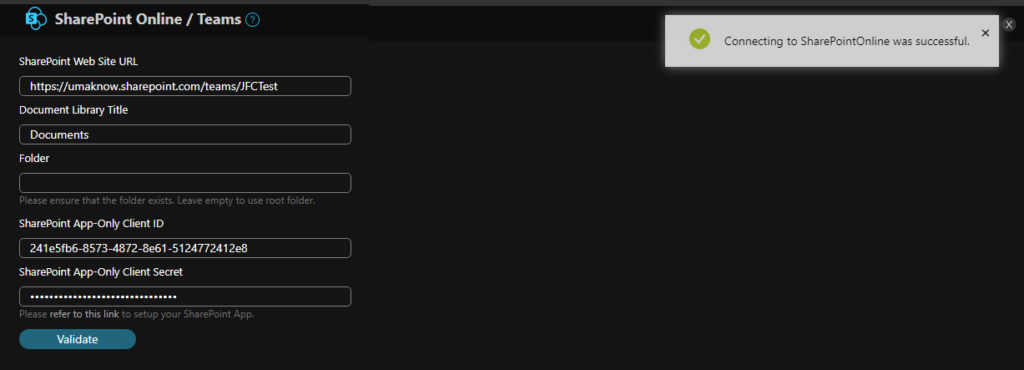
From there you are ready to launch your document generation.
If the connection fails, you might see the following:
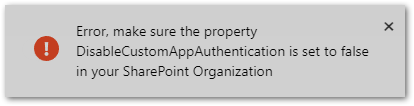
A Tenant setting will need to be changed by your SharePoint Administrator:
The DisableCustomAppAuthentication flag must be set to false at the Tenant level with the Set-SPOTenant command (your SharePoint Admin should first check the status of this flag with the Get-SPOTenant command then switch it to false if your company security policy allows it).
Accessing the Files from Teams
Open Teams (1) and select the channel where you want to add the link to the generated documents.
Click the + icon (2)
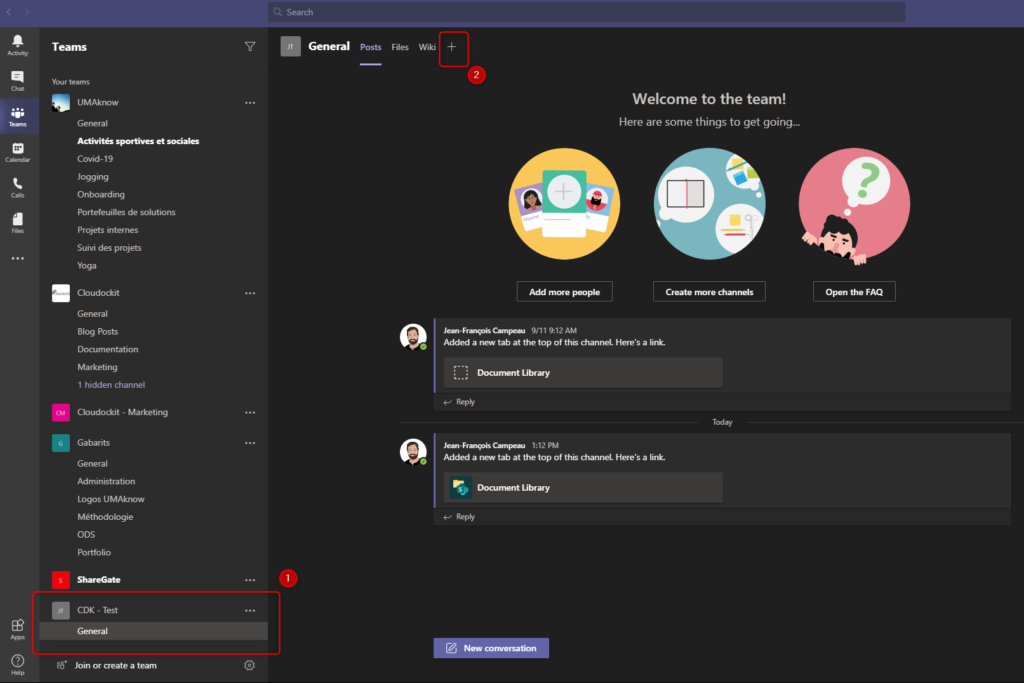
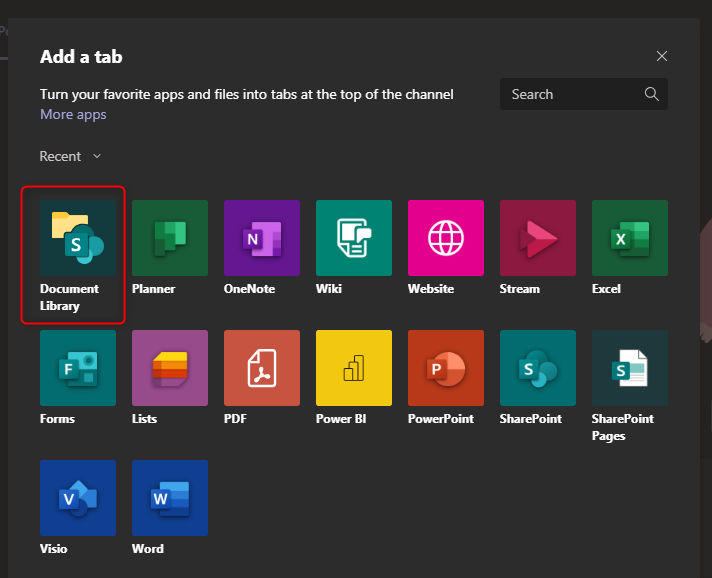
Select Document Library from the tab menu.
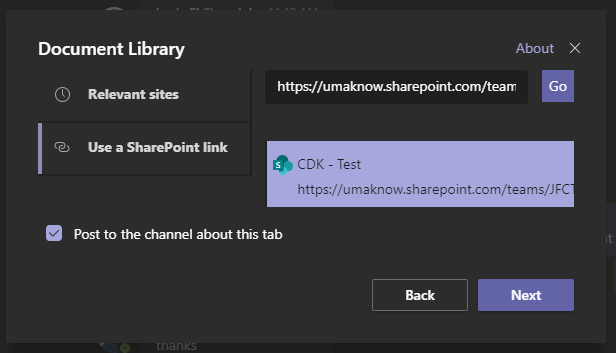
Click Use a SharePoint link.
Paste the URL of your SharePoint site then click Go and Next.
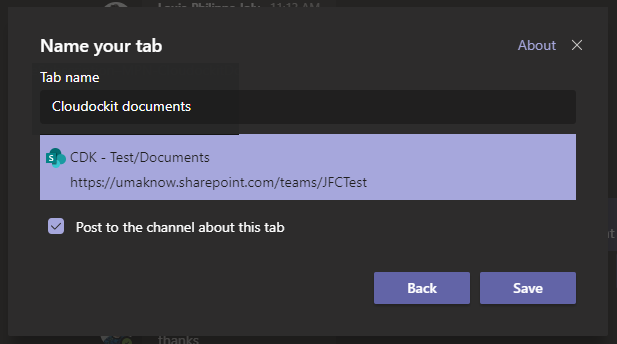
Select the Documents library (if you specified a subfolder, select it under Documents) and click Next.

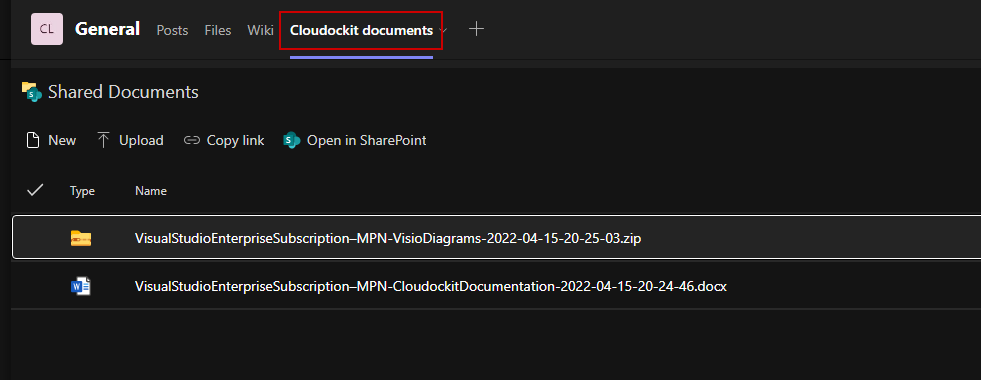
Give the tab a unique name(e.g. Cloudockit documents) and click Save.
In the top menu, Cloudockit documents is now available.
Click on the menu and the documents dropped by Cloudockit are now available.