

Knowledge Base
Connect your Google Cloud Platform Environment
From the list of platforms, select Google Cloud Platform.
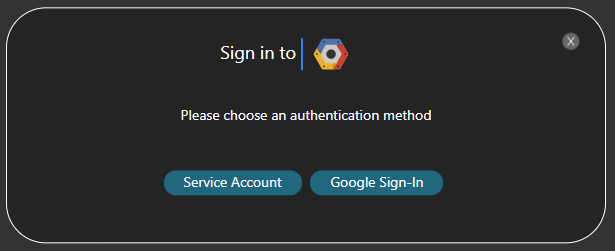
You will be prompted with the two following options to connect your GCP Environment:
- Service Account (Recommended)
- Google Sign-In
Service Account (Recommended)
STEP 1 – CREATE A SERVICE ACCOUNT
Sign in to the GCP Console and click on IAM & Admin/Service Accounts
Select the project where you want to create the Service Account (you will then be able to give the appropriate permissions to the other projects with the same service account)
Click on Create Service Account and enter the Service Account Name. (e.g., use Cloudockit). Then click on Create
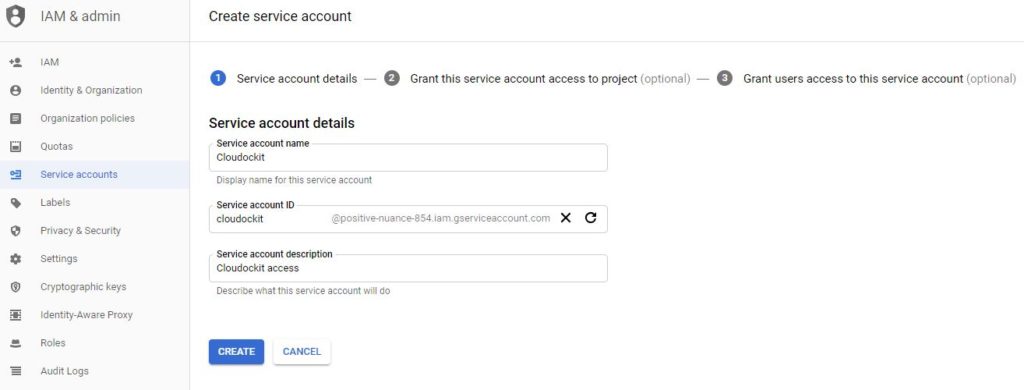
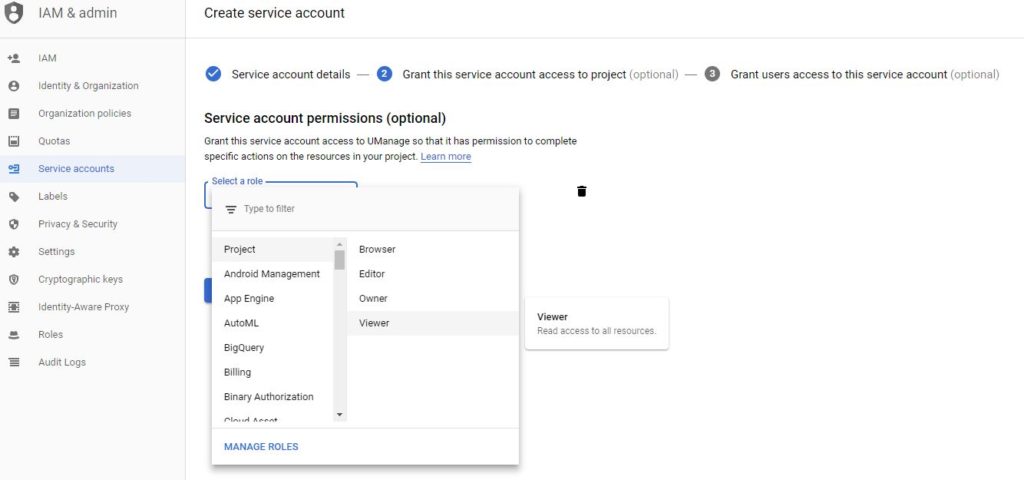
Select the role Project/Viewer.
Click on Continue
Click on Create Key and select JSON
Click on Create
Save the file locally
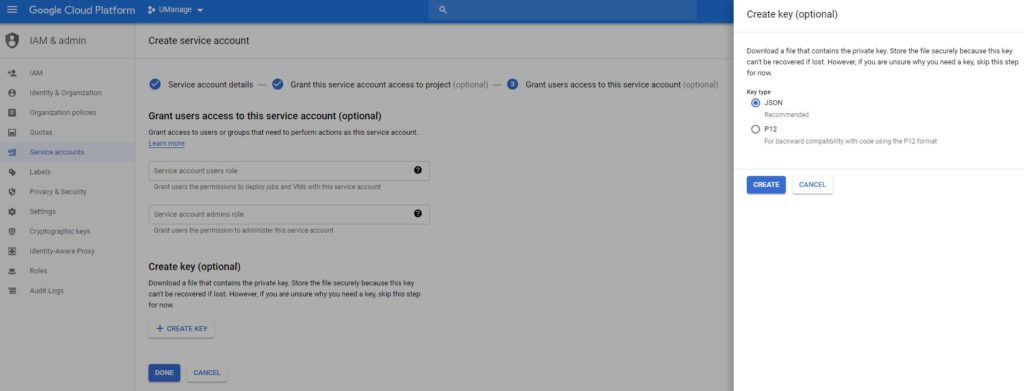
To save the service account, click Done
STEP 2 – ACTIVATE THE APPROPRIATE APIs
Since Cloudockit is using the Cloud Resource Manager API to list all the projects, you need to Enable this API in order for Cloudockit to view your resources. You also need to activate other APIs (see complete list below) depending on the workload you want to document.
Please note that these APIs need to be activated in the Project where you created your service account (created in step 1)
To do so, click on API & Services and then click on Enable APIs and Services.
In the search box, enter Resource Manager
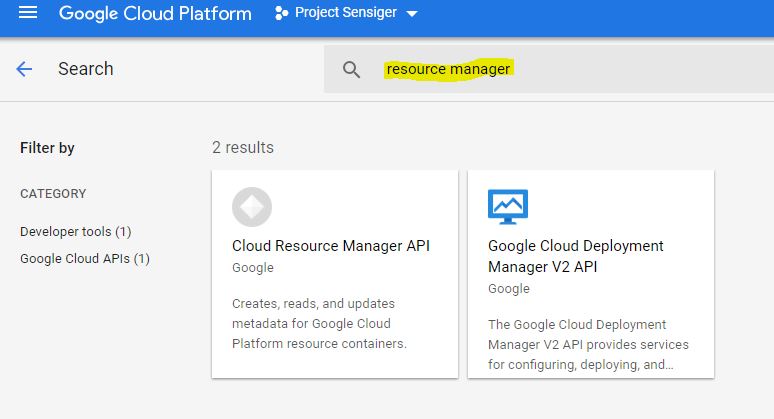
Click on Cloud Resource Manager API and ENABLE.
Once you have activated this API, you should also activate the APIs that are used by Cloudockit to automatically create the documents and diagrams:
- Compute Engine API
- Kubernetes Engine API
- Cloud Resource Manager
- App Engine Admin
- Cloud Pub/Sub
- Cloud Spanner API
- Dataflow API
- Cloud Bigtable Admin
- Cloud SQL Admin API
- Cloud IoT API
- Google Cloud Memorystore for Redis API
- Cloud Functions API
STEP 3 – LOG IN TO CLOUDOCKIT
When you are prompted for a GCP authentication, select Service Account
Click on Browse and select the JSON file you have just downloaded in the previous step
Click on Login. You should now see your GCP Account

Google Sign-In
Why we recommend Service Account: Google Cloud does not allow OAuth 2 User Authentication to the scope cloud-platform read-only. You should use Service Account to ensure to receive all the information.
To use your Google Account, you simply need to log in using your Google Account that has the required privileges to your Google Cloud Project.
Permissions and Privileges
GENERAL DOCUMENTATION
To generate documentation using Cloudockit, only Viewer role is required at the project level.
DROP-OFF
To drop off documentation in the storage, the credentials used to generate the documentation must have the following permissions:
- storage.buckets.create
- storage.buckets.get and storage.objects.create.
GCP SECURITY COMMAND CENTER
To read information from the GCP Security Command Center through the compliance rules, the credentials used to generate the documentation must have roles/securitycenter.adminViewer.
BILLING
Cloudockit supports billing information extraction only in a JSON output format.
Cloudockit uses BigQuery Dataset to retrieve the billing information.
To get the billing information into your documentation, you need to:
- Ensure the Service Account you are using has read permission to the BigQuery dataset where the billing information is stored.
- Enter the following information in the Billing Details section in the Workload tab (the information is found in the Google Cloud Console/Billing/Billing Export/Daily cost detail/Dataset name)
- Dataset that contains the billing data: Specify the name of the BigQuery Dataset that contains billing data.
- Table that contains the billing data: Specify the name of the BigQuery Table that contains the billing data.
GOOGLE KUBERNETES ENGINE
The credentials used to generate the documentation must have Kubernetes Engine Service Agent, on the Kubernetes Cluster only. This allows Cloudockit to connect to the cluster and retrieve the details.