Knowledge Base
How-To Create an Azure Active Directory Application for Cloudockit Authentication
This is a 2 step procedure:
- Step 1: Create the AAD Application
- Step 2: Give the AAD Application the appropriate permissions
Step 1: Create the AAD Application
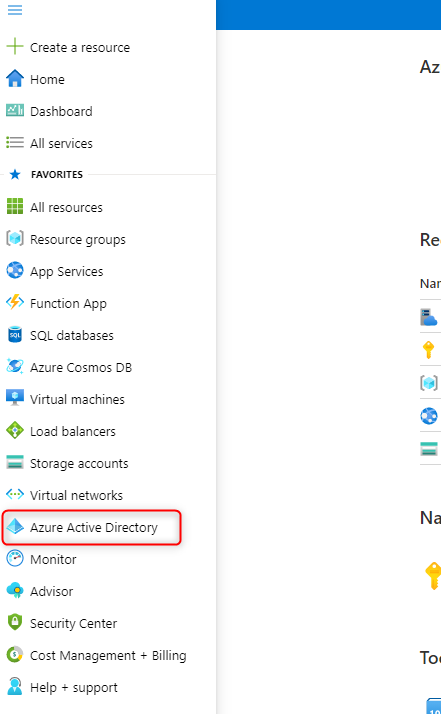
Navigate to https://portal.azure.com and select the Azure Active Directory blade:
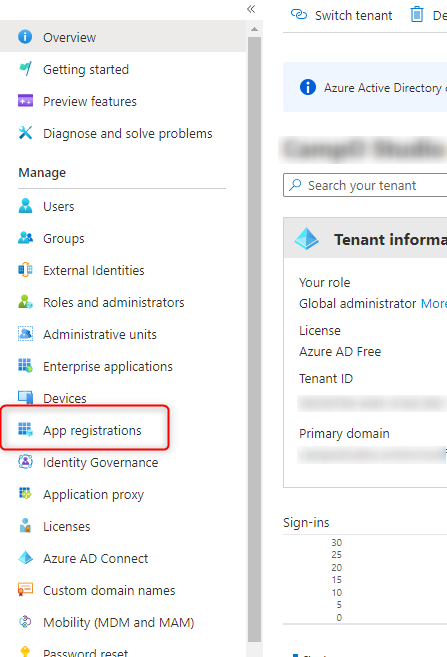
Select App Registration
Click New Registration
- Name: App Registration Name of your choice
- Supported account types: Accounts in this organizational directory only
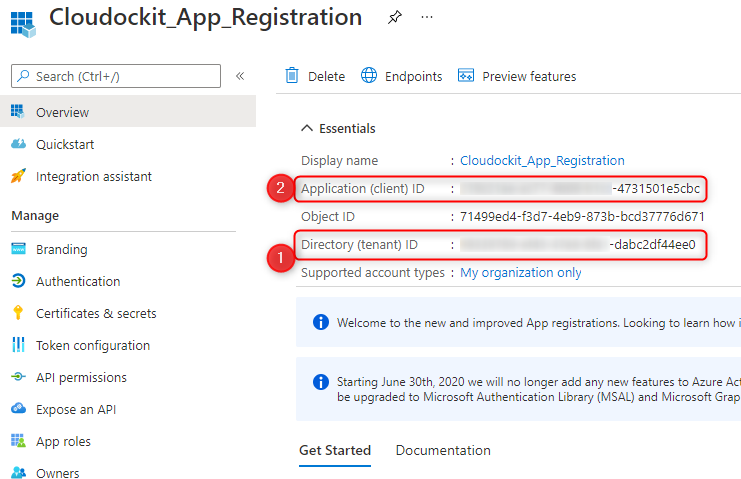
Once the application has been created, take note of the following values:
- Directory (tenant) ID
- Application (client) ID
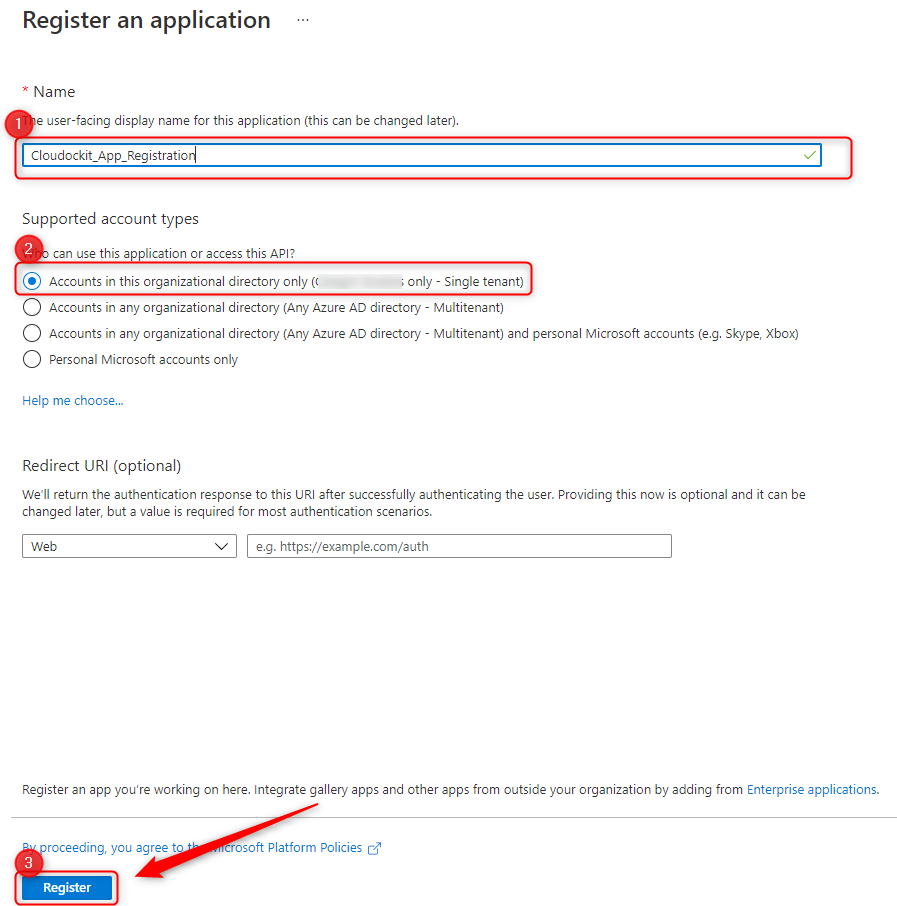
Click register
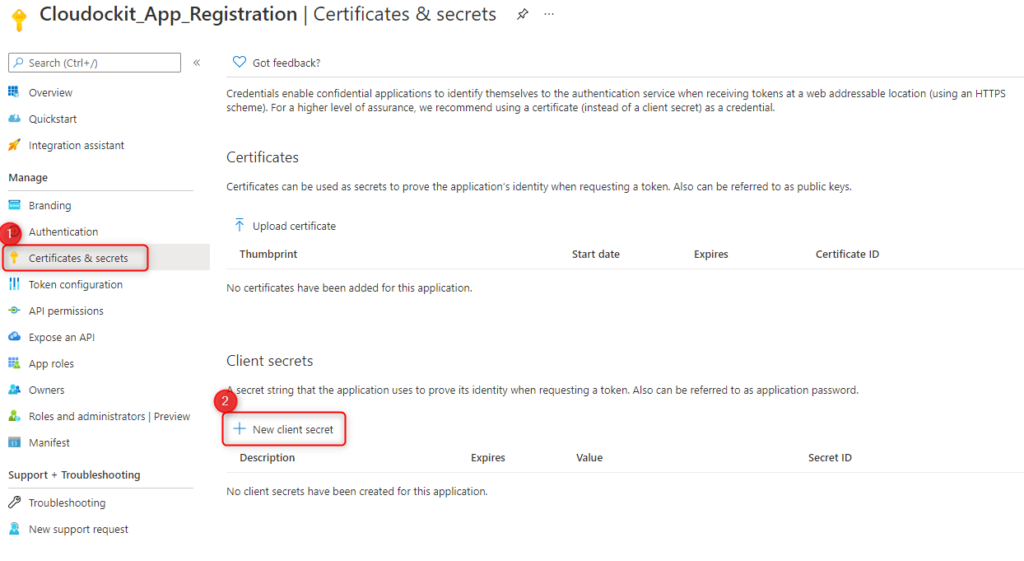
Click Certificates & secrets
Click New client secret
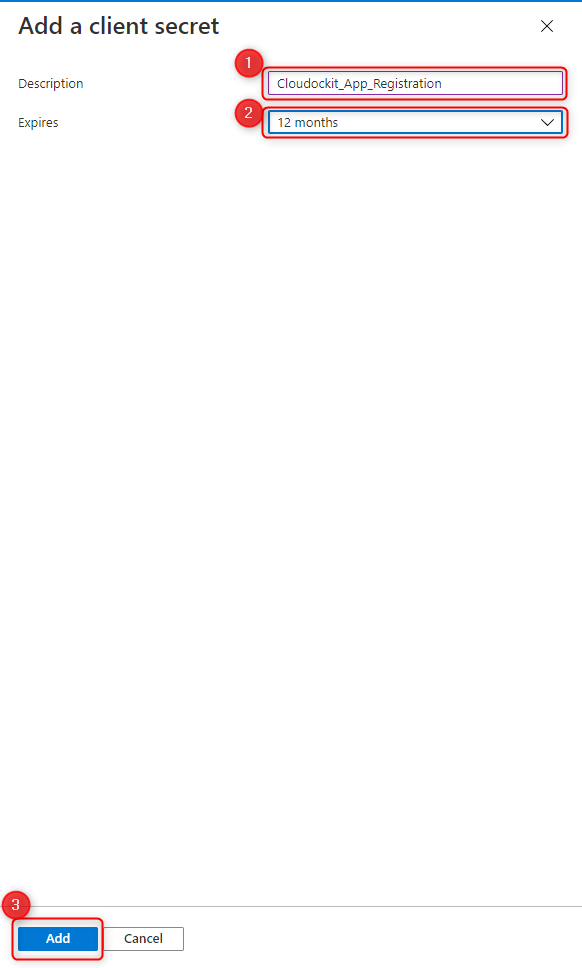
Fill in the following fields
Description: Enter the description of your choice
Expires: Choose the expiration of your choice
Click Add
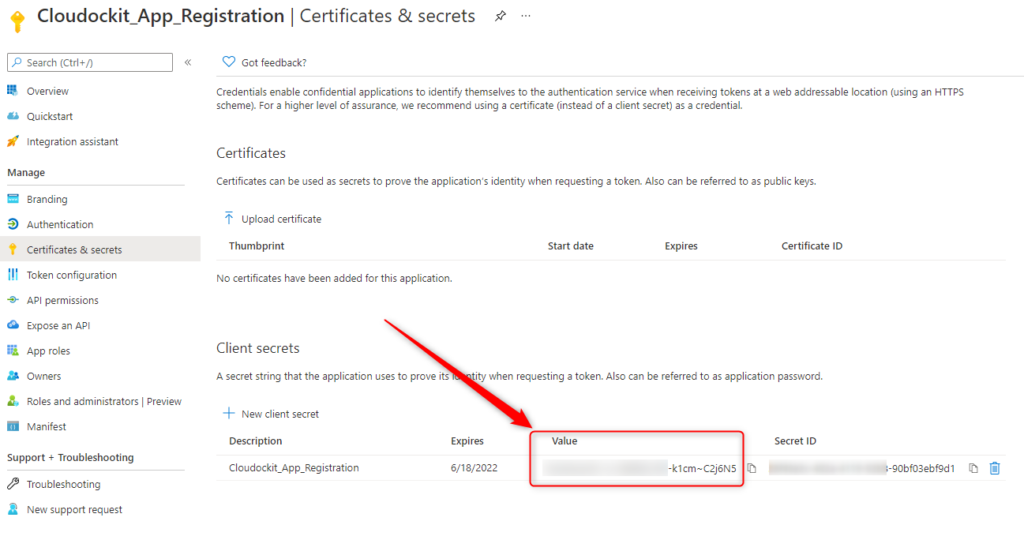
Copy and paste the value. Keep it with the Directory ID and Application ID.
Note: This value is only visible right after its creation. You will have to create a new one if you have not saved it.
Step 2: Give the AAD Application the appropriate permissions
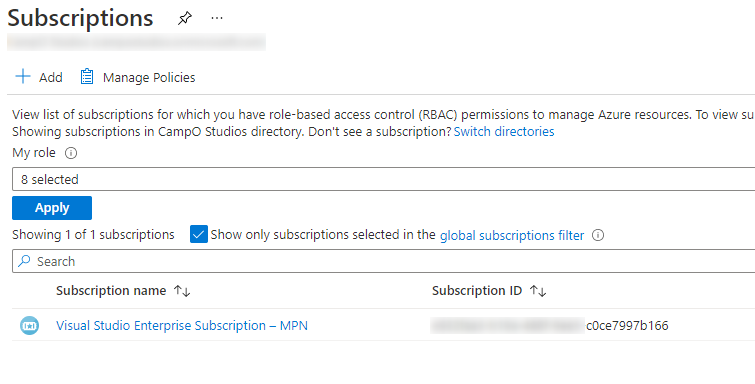
From the Azure Portal go to subscriptions.
Select the subscription of your choice.
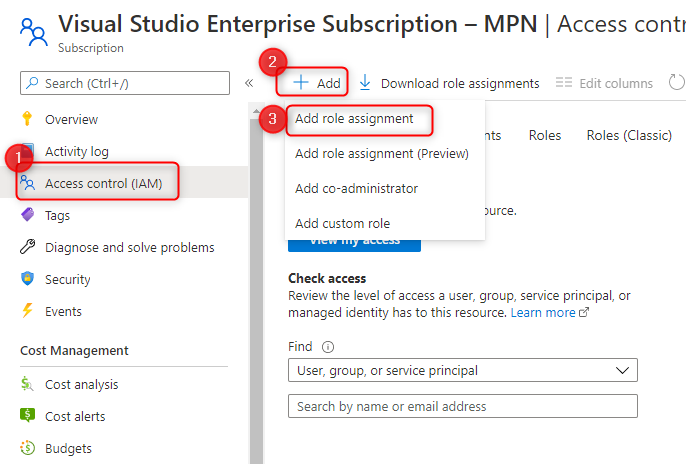
Select Access Control (IAM)
Add
Add role assignment
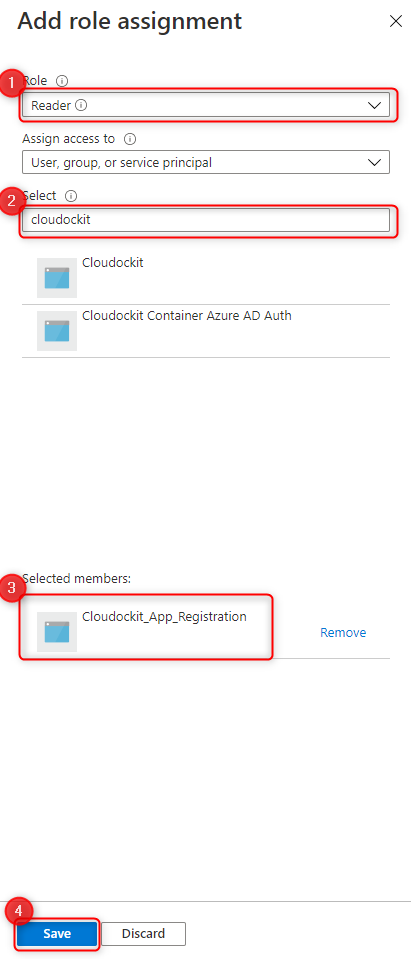
Fill in the following fields
Role: Reader
Select: Enter the name of the app registration, select it from the list below until it is added to the selected members section.
Click Save