Knowledge Base
Lucidchart access configuration
In order to create Lucidchart diagrams, you now need to enter your Lucidchart credentials into Cloudockit.
You’ll also need to setup Lucidchart to allow for Cloudockit use of your credentials.
Important notes:
– you cannot use Lucidchart diagrams generation with scheduled scans (Desktop and Container versions) as Lucidchart App access requires a manual validation of the account identity.
– you must have the necessary Lucidchart license plan that provides the Developer Portal for OAuth 2.0 integrations (visit Lucidchart website for details)
Lucidchart setup
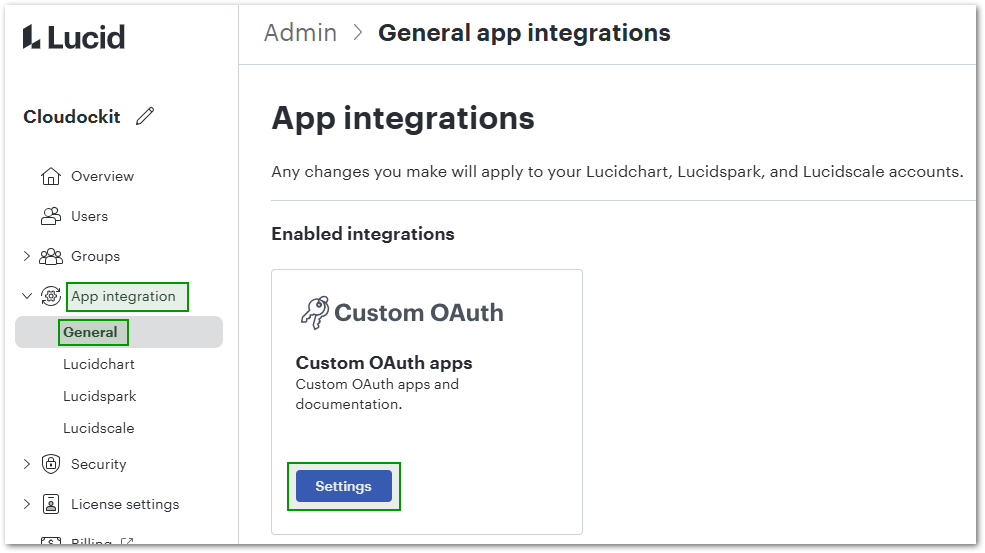
- Go to https://admin.lucid.app/
- On the left sidebar, click General under App Integrations
- Click on the Custom OAuth Settings button:
- Select the OAuth 2.0 tab at the top of the screen
- Click on the link to Go to developer portal (you’ll need to activate it if it’s not)
- Create a new custom OAuth 2.0 client with your preferred name (ex. Cloudockit)
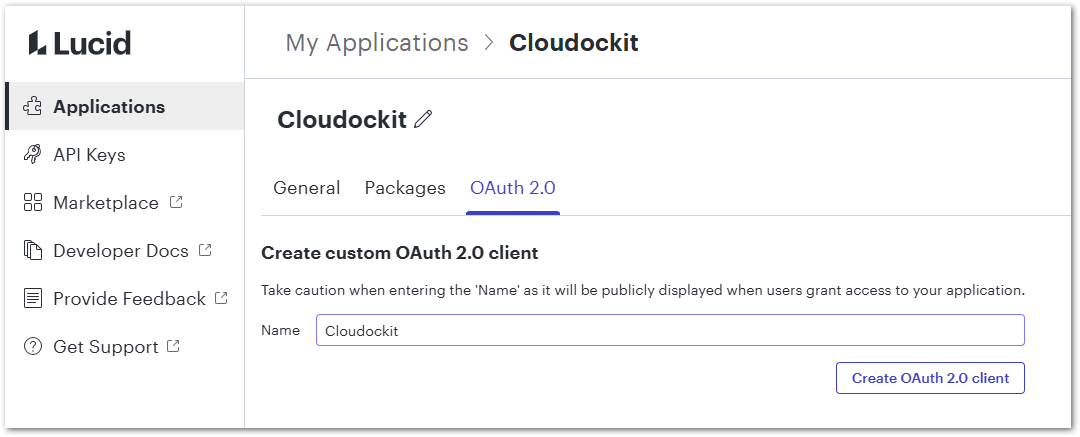
- Copy and save the Client ID and Client Secret as you’ll need them when using Cloudockit

- In the Authorized Redirect URIs, you will need to add the two following URLs:
- https://*.cloudockit.com/CDKExternalAuthentication/AuthenticateLucidchartDesktopCatchCode
- https://*.cloudockit.com/CDKExternalAuthentication/AuthenticateLucidchartCatchCode
- Note: If you’re using the container version, you should, however, indicate the following URLs:
- https://<yourAppServiceURL>/CDKExternalAuthentication/AuthenticateLucidchartCatchCode
- https://<yourAppServiceURL>/CDKExternalAuthentication/AuthenticateLucidchartDesktopCatchCode
Cloudockit setup
The Client ID and Client Secret need to be entered on the https://generate.cloudockit.com website in the Document tab -> Lucidchart

Access validation
Upon clicking the Validate button, a pop-up window should open (make sure that your browser allows pop-ups):

Log in with your email and password associated with the OAuth 2.0 client and grant access to Cloudockit
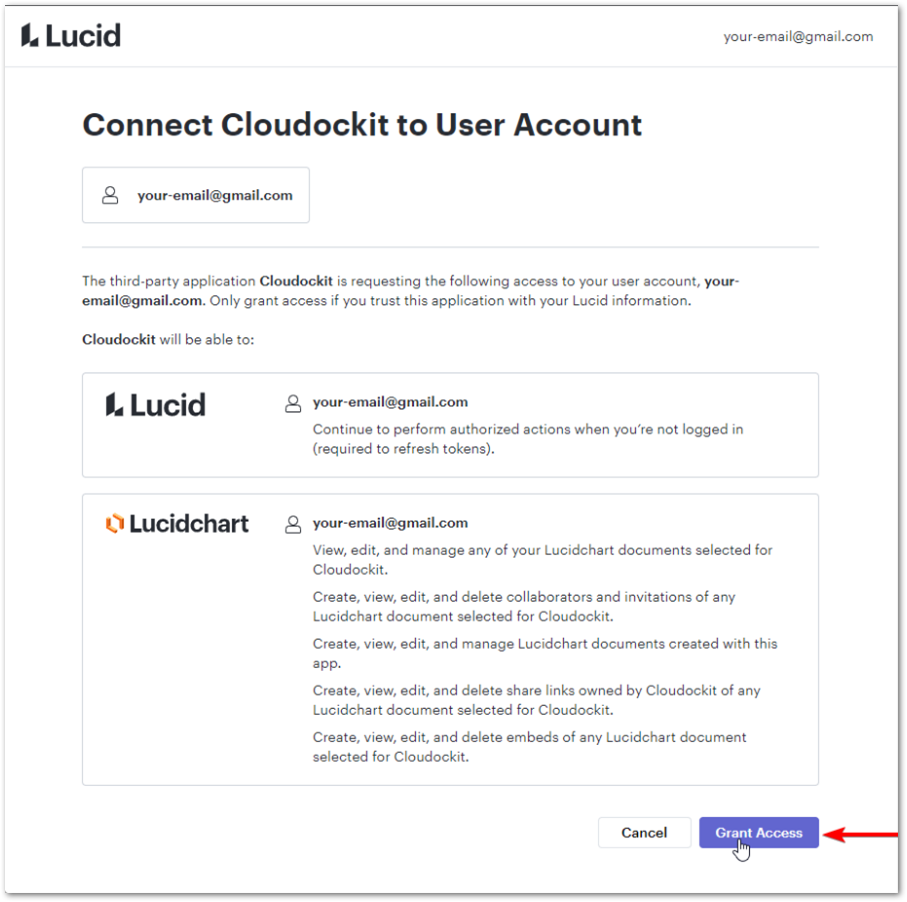
In Cloudockit, a message should display if the connection was successful: