Knowledge Base
Organize and Filter Your Documents
Cloudockit enables you to select advanced features in order to organize and filter what you are scanning.
Firstly, go to the organize content tab.
Please note that the options in the preview are not the same for all cloud providers.
As an example, the screenshot below is for Microsoft Azure users.
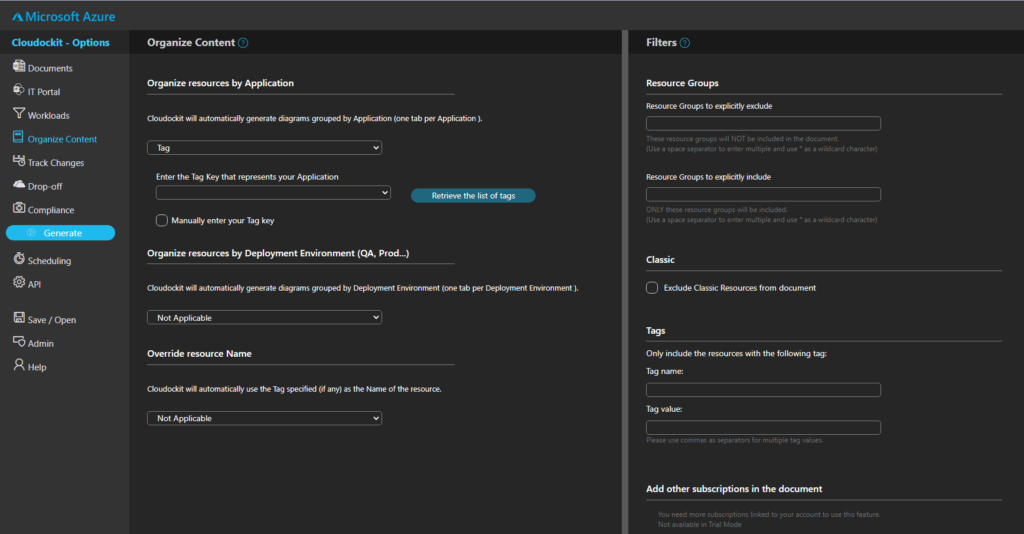
As you can see there are two main columns
Organize content
The first column entitled organized content is where you will specify how Cloudockit will detect specific properties of your component and organize your content.
- For example in the first section named automatically detect application, you can specify how Cloudockit is going to understand which resources belongs to which business application. This feature is particularly useful when you want to create diagrams per business application. With this feature, you will automatically have a diagram that contains multiple tabs: one tab per business application.
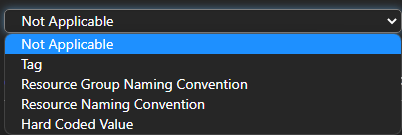
The following are the different options to specify how Cloudockit can find which business Application a resource belongs to:
Filtering
With the filtering column you can specify how you want to filter what is scanned.
For example, in Azure, you can filter by resource group, by classic or arm resources and you can also use tags for filtering. You can also specify other subscriptions to include in the document you want to generate.
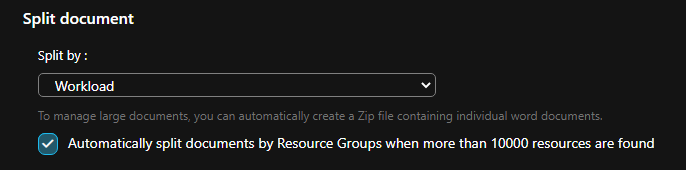
In addition to filtered resources, please note that you can also automatically split the documents generated if you want to avoid massive documents. To do so you, simply go into the document tab and under the Reports options select Split document and select how you would like to split the documents: