

Knowledge Base
AWS – EC2 Desktop Cross-Account Use-case Setup
Introduction
The purpose of this document is to provide the detailed steps to install and configure Cloudockit Desktop in an optimal way so you can get going as quickly as possible with your automated documentation generation for your AWS environment.
Cloudockit desktop can be installed in many ways. On a workstation, on a server, on a virtual machine.
Based on our experience we have identified that the optimal way is to create an EC2 instance and install Cloudockit desktop to automate your document generation.
Step 1 – Create the IAM User in the source Account
To log into Cloudockit and list the Accounts to scan, you need to enter the Access Key ID and Secret Access Key of the IAM User located in a source Account with the corresponding permissions to list the accounts.
In AWS Console 🡺 IAM 🡺 Users
- Create an IAM user, create an Access Key for this user and save it (with the Secret Access Key) to be used later
- In the user ‘Permissions’ tab, attach the following Inline Policy to the user permissions :
{
  "Version": "2012-10-17",
  "Statement": [
      {
          "Sid": "VisualEditor0",
          "Effect": "Allow",
          "Action": [
              "organizations:ListAccountsForParent",
              "organizations:ListAccounts"
          ],
          "Resource": "*"
      }
  ]
}
Step 2 – Create the EC2 instance Role in Source Account (CloudockitEC2RoleCrossAccount)
The EC2 instance where Cloudockit is installed needs to have a role attached to it.
This role’s only purpose will be to assume the role actually used for the scans and for the storage access.
It will allow the EC2 to authenticate as the scan role.
In AWS Console 🡺 IAM 🡺 Roles
- Create an IAM Role (you can name it CloudockitEC2RoleCrossAccount)
- Attach the following Policy to the role’s Permissions :
{
    "Version": "2012-10-17",
    "Statement": {
        "Effect": "Allow",
        "Action": "sts:AssumeRole",
        "Resource": "*"
    }
}- Trust relationships
{
    "Version": "2012-10-17",
    "Statement": [
        {
            "Effect": "Allow",
            "Principal": {
                "Service": "ec2.amazonaws.com"
            },
            "Action": "sts:AssumeRole"
        }
    ]
}
Step 3 – Create the Scan Role (CloudockitScanRole) in the targeted Accounts
This is the main role which will be used to scan the resources and access the storage account.
In every account you want to scan (including the source account where the IAM user & EC2 instance Role & EC2 Instance are created), do the following:
- Create an IAM Role (you can name it CloudockitScanRole)
- Attach the following 2 Policies to the role’s Permissions :
- ReadOnlyAccess (Type : AWS managed – job function)
- Inline Policy S3BucketAccess (Type : Customer inline)
{
    "Version": "2012-10-17",
    "Statement": [
        {
            "Sid": "VisualEditor0",
            "Effect": "Allow",
            "Action": [
                "s3:GetBucketLocation",
                "s3:GetObject",
                "s3:ListBucket",
                "s3:PutBucketCORS",
                "s3:PutObject",
                "s3:DeleteObject"
            ],
            "Resource": "*"
        }
    ]
}
OR if you want to limit the access to a specific S3 storage account, you can specify it as follows :
{
    "Version": "2012-10-17",
    "Statement": [
        {
            "Sid": "VisualEditor0",
            "Effect": "Allow",
            "Action": [
                "s3:GetBucketLocation",
                "s3:GetObject",
                "s3:ListBucket",
                "s3:PutBucketCORS",
                "s3:PutObject",
                "s3:DeleteObject"
            ],
            "Resource": [
                "arn:aws:s3:::NameOfYourS3Bucket",
                "arn:aws:s3:::NameOfYourS3Bucket/*"
            ]
        }
    ]
}- Trust relationships :
{
    "Version": "2012-10-17",
    "Statement": [
        {
            "Effect": "Allow",
            "Principal": {
                "AWS": [
                    "arn:aws:iam::SourceAccount:role/CloudockitEC2RoleCrossAccount"
                ]
            },
            "Action": "sts:AssumeRole",
            "Condition": {}
        }
    ]
}
Step 4 – Create the EC2 Instance
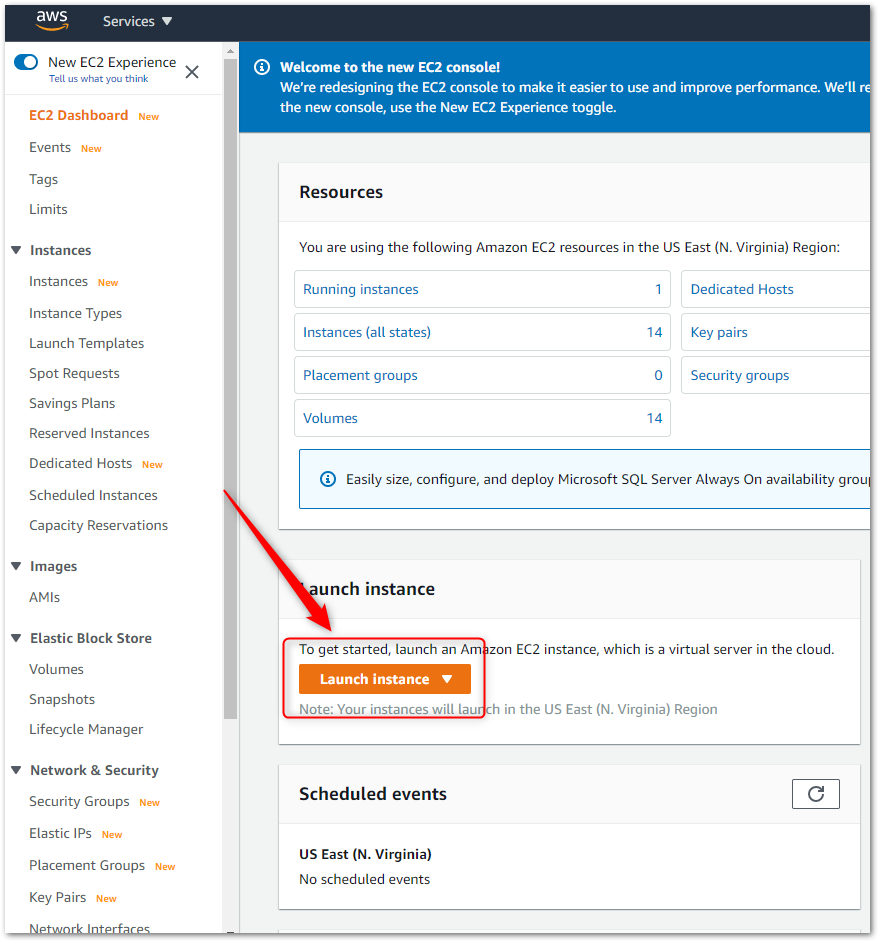
Connect to the AWS Console and go to the EC2.
From the EC2 Dashboard page click on the Launch instance button.
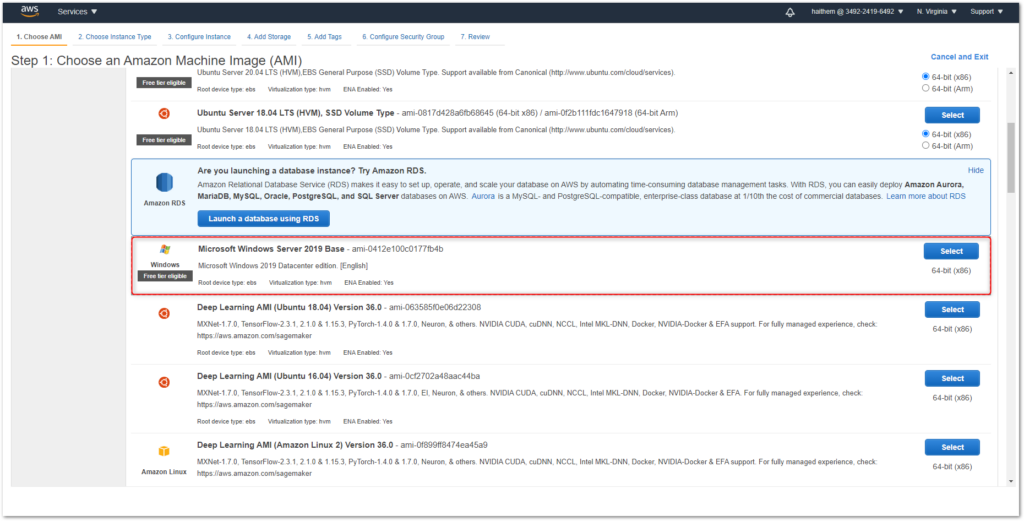
CHOOSE AN AMAZON MACHINE IMAGE (AMI)
Select Microsoft Windows Server Base (Linux is not supported).
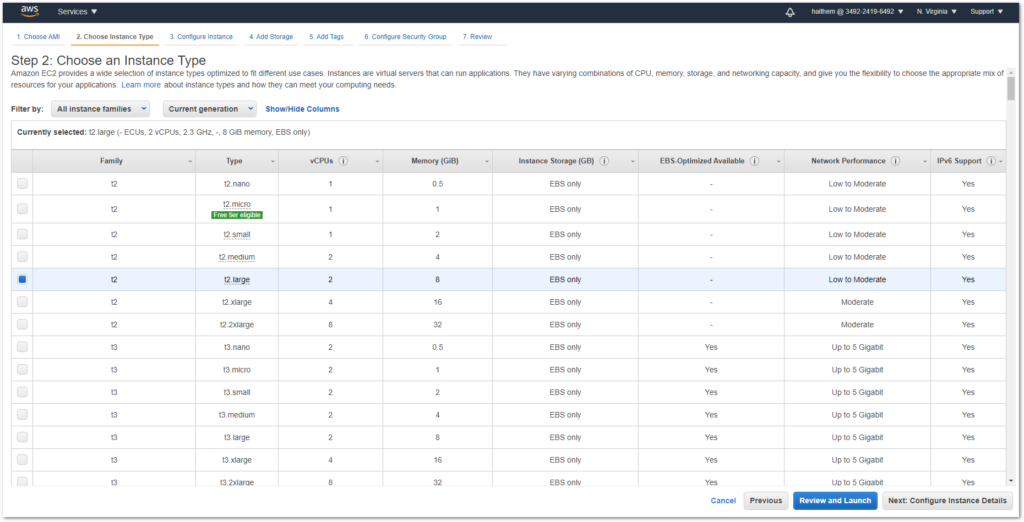
CHOOSE AN INSTANCE TYPE
We have identified that Cloudockit Desktop performs at its best with 4 CPUs and 16 GiB of memory. You can however choose the type that you prefer.
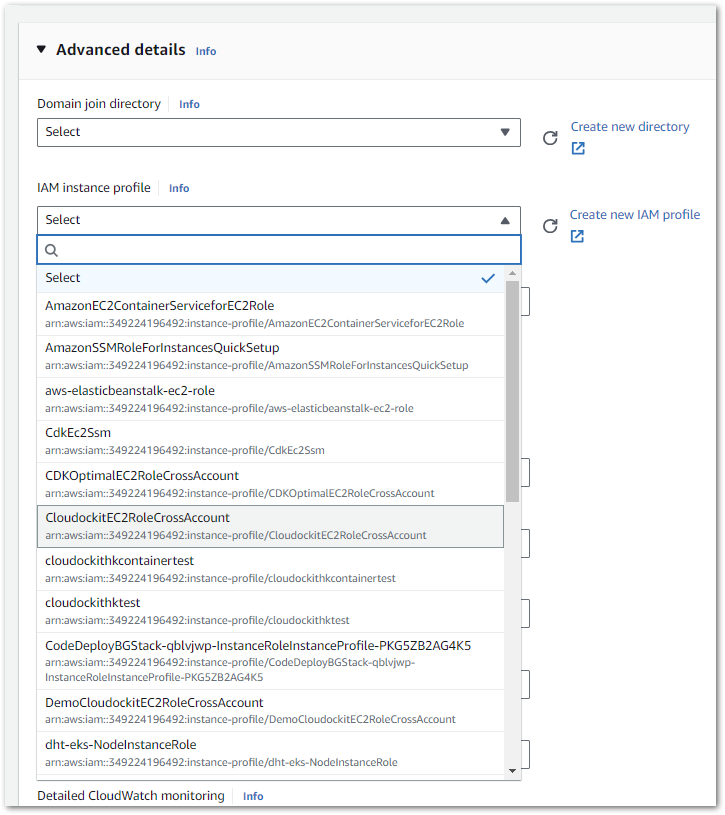
CONFIGURE INSTANCE DETAILS
Configure the instance based on your organization’s best practices and make sure to select the CrossAccount IAM role created in the previous step.
ADD STORAGE
You can leave the default parameters.
ADD TAGS
Add the tags based on your organization’s tagging policy.
CONFIGURE SECURITY GROUP
Create or assign a security group based on your organization’s security policies.
REVIEW INSTANCE LAUNCH
Review the parameters that have been set and press Launch to create the instance.
Step 5 – Install Cloudockit Desktop
DOWNLOADING THE INSTALLATION FILE
You can get the Cloudockit installation file from our website at https://generate.cloudockit.com/.
Click on the Download Now button to get the MSI file.
Step 6 – Launch Cloudockit Desktop and Test
Once the setup is done, you can start Cloudockit Desktop on the EC2 Instance.
Login :
AWS 🡺 Use cross-account role
- Enter the Access Key ID and Secret Access Key of the IAM User (created at step 1)
- Role to assume : CloudockitScanRole (created at step 3)
- Select the accounts in which you have created the role at step 3.
STORAGE VALIDATION
Drop-Off 🡺 Your Storage.
If the S3 bucket you want to validate is in the account displayed at the top-right corner of the screen (Current Account : ..) you can enter the S3 bucket name only and validate.
If the S3 bucket is in another account (among the ones you want to scan), you should enter the arn of the S3 bucket including the corresponding account number, in the following format : arn:aws:s3::AccountNumber:S3BucketName