

Knowledge Base
Specific permissions to read Entra ID information
Read the following to learn how to provide access to your Active Directory. Two methods are provided: granting Global Admin Role or providing Admin Consent.
Grant Global Administrator Role
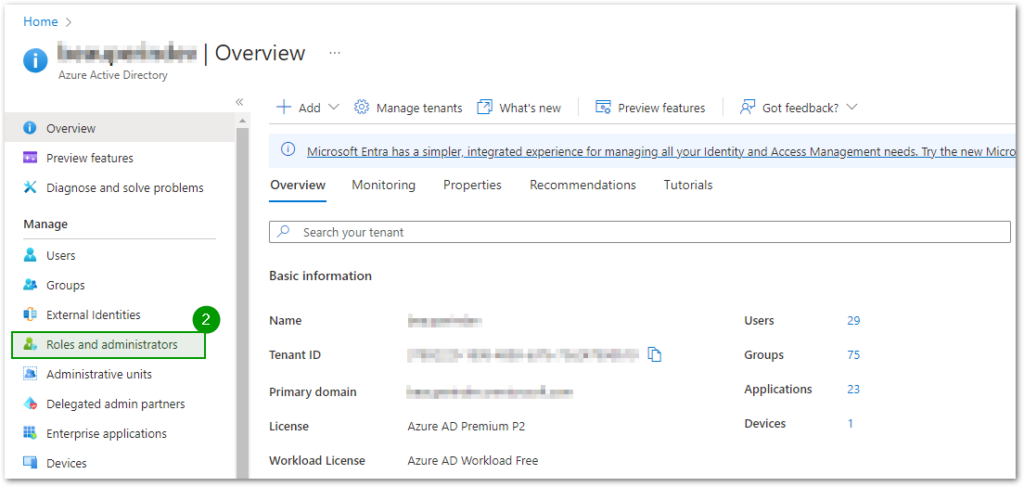
- First head over to the Azure Portal, you will then need to go to the Active Directory service.
- Click on Roles and administrators under the Manage section on the left sidebar.
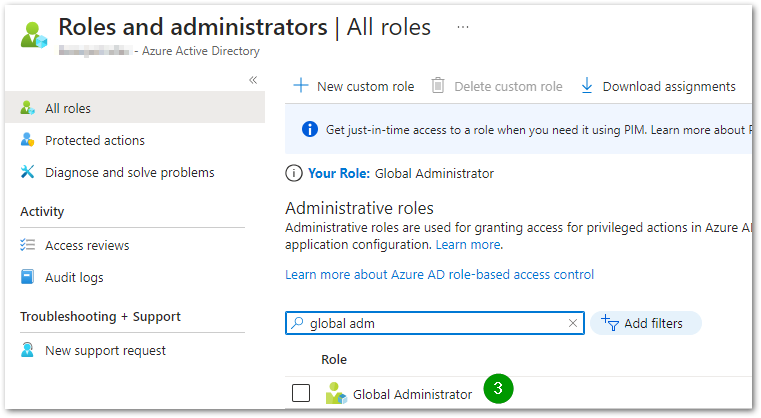
- Search for the keyword Global Administrator and click on it.
- Add an assignment and select the member(s) you would like to be able to scan the Azure Active Directory. In order to determine which assignment type to choose, you can refer to this link: Assign Azure AD roles in Privileged Identity Management.
- On the Cloudockit Website, log in, click on the Workloads section on the left sidebar, scroll down, check the Active Directory checkbox and click on the Authorize button (SaaS only)

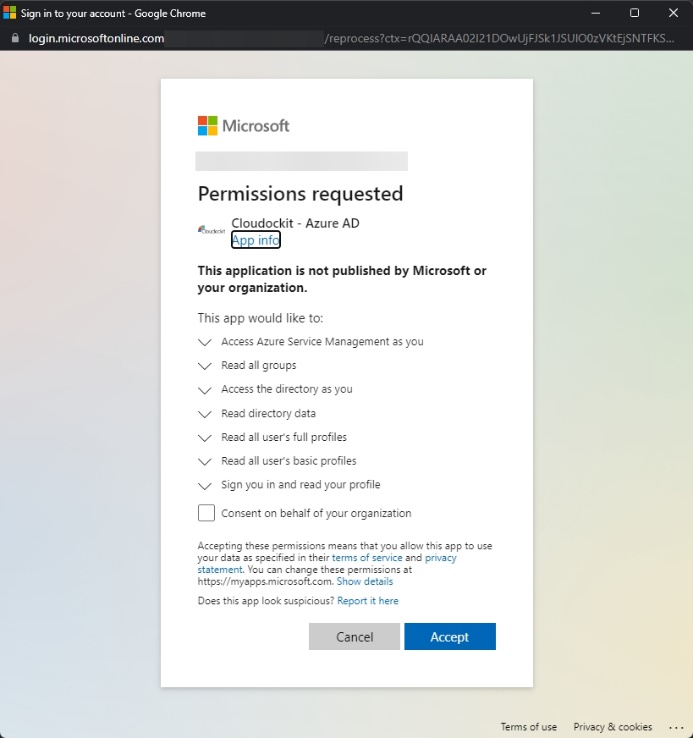
- Log in with the Global Administrator account and press the Accept button.
- The Authorize button should be grayed out and should display Completed if the authorization was successful.

Provide Admin Consent
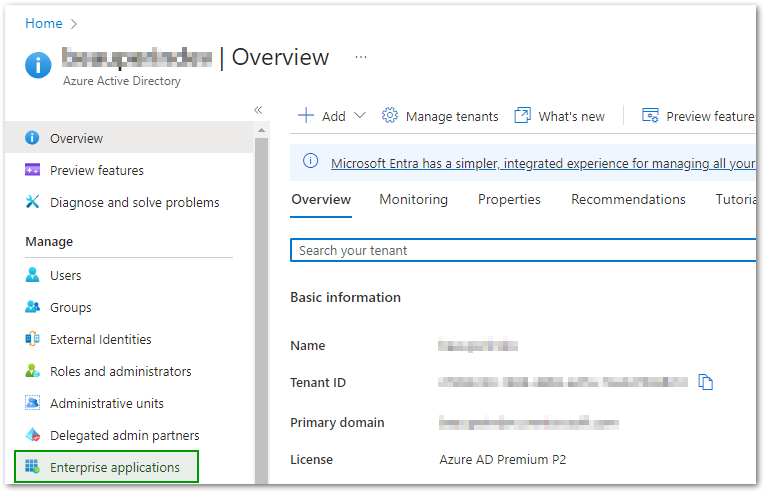
- First head over to the Azure Portal, you will then need to go to the Active Directory service.
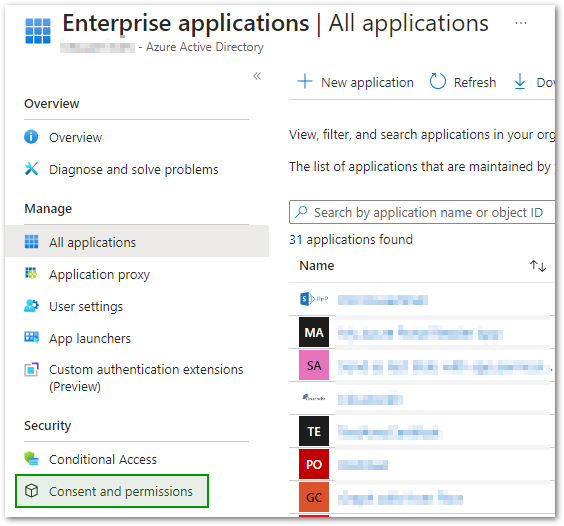
- Click on Enterprise applications in the left sidebar under the Manage section.
- Click on Consent and permissions in the left sidebar under the Security section.
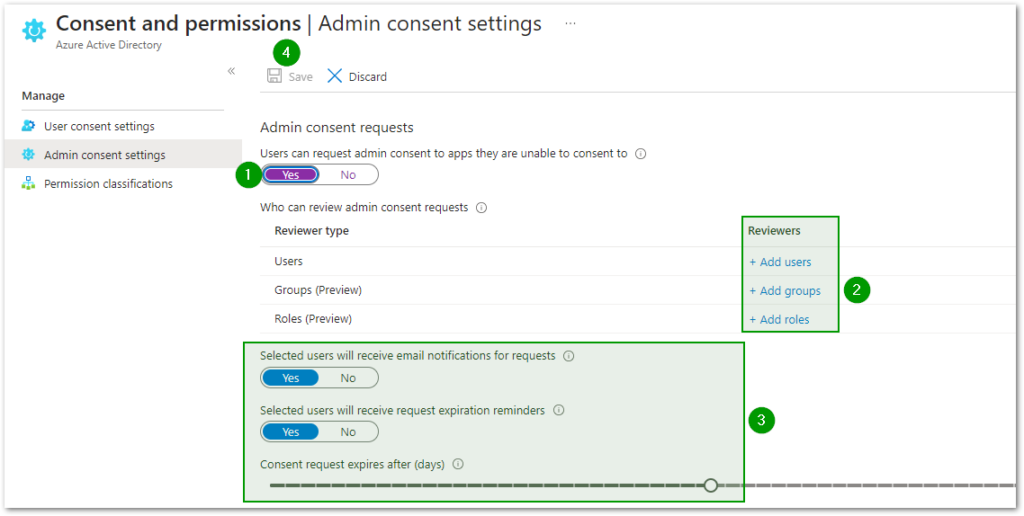
- Click on the Admin consent settings under the Manage section.

- Set Users can request admin consent to apps they are unable to consent to to Yes.
- Add any user(s), group(s) or role(s) of your liking that will be able to consent to future admin consent requests. (The reviewers added won’t be able to consent if they do not have the required permissions to access the Active Directory, we recommend adding the Global Administrator role or users with the Global Administrator role).
- Set the other options to your liking, here’s an example
- Press the Save button
- On the Cloudockit Website, log in, click on the Workloads section on the left sidebar, scroll down, check the Active Directory checkbox and click on the Authorize button.
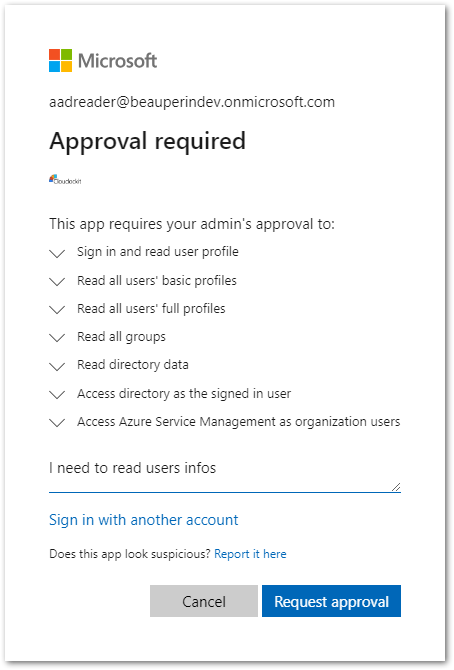
- Log in with an account that does not have the Global Administrator role.
- Request approval with your justification:
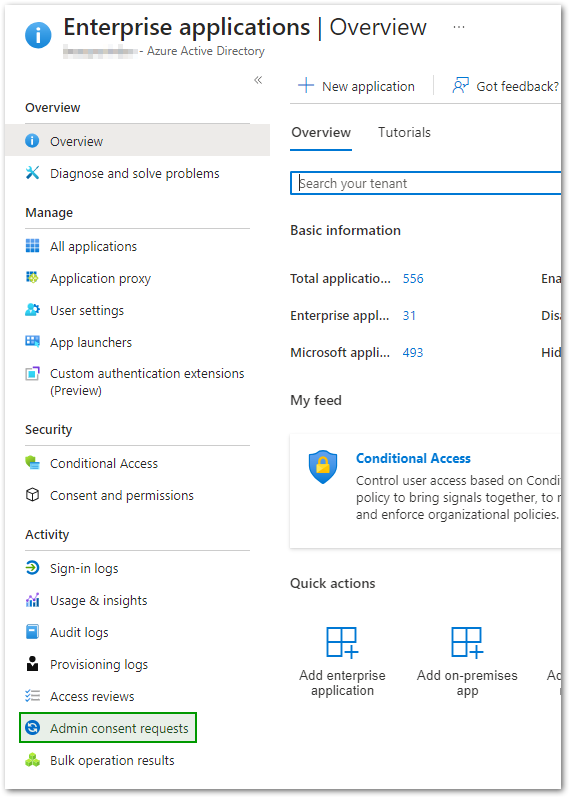
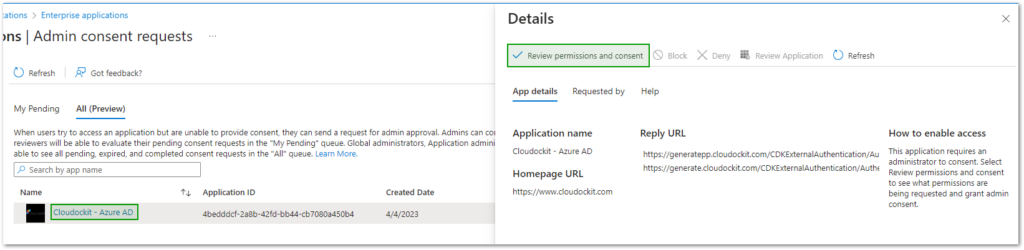
- Re-enter the Enterprise Applications blade while logged with an account that has been added to the list of reviewers and click on Admin consent requests under the Activity section on the left sidebar:
- Click on pending admin consent request Cloudockit – Azure AD and click on Review permissions and consent on the right-side panel.
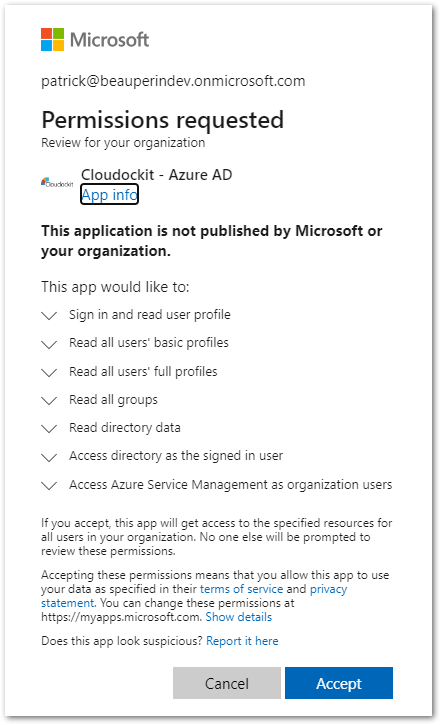
- Press the Accept button to grant the listed permissions.
- You should now be able to scan the Azure Active Directory with any account that does not have the Global Administrator role.
Note: You can always revoke the access to Azure AD by going back to the Azure Portal in the Azure Active Directory service, Enterprise applications, All applications, search for Cloudockit – Azure AD or the Object ID 32858d1d-9f08-4a01-a04a-07cc716a953f and click on it, go to Properties and click on the delete button. Reference