

Knowledge Base
Cloudockit API
Overview
Using Cloudockit API allows you to automate document generation using your own conditions, specifications and integrate Cloudockit in your processes and applications.
Please note that there is a limitation on the number of API Calls that you can do. This limitation depends on the license that you have:
For Internal Use Licenses:
- 3 calls per week for a 1 user license
- 10 calls per week for a 5 users license
- 50 calls per week for a 25 users license. You’ll also have an unlimited number of API calls of your container installation.
For Commercial Use Licenses:
- 10 calls per week for a 5 users license
- 20 calls per week for a 10 users license
- 30 calls per week for a 15 users license
- And so forth, with increments accordingly (for customers opting for the Container license, the number of API calls is unlimited)
Only successful API scanning calls are accounted for, not failed ones and not TestAuthentication endpoint calls.
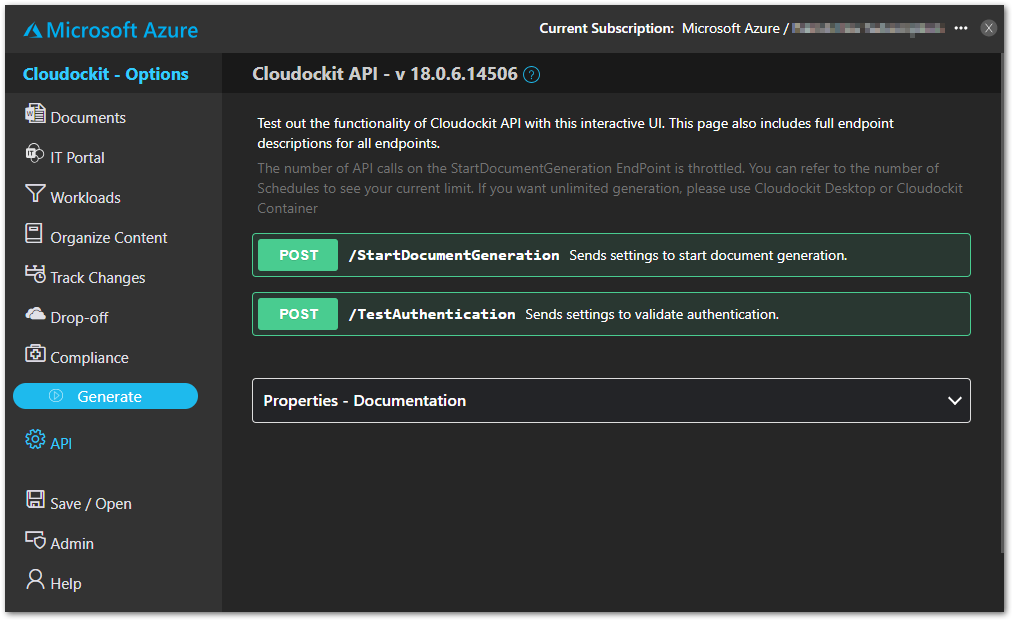
Endpoints
Cloudockit API has 2 endpoints:
- CDKAPI/StartDocumentGeneration
- We start document generation with the sent settings in the request body. This endpoint returns a URL to a JSON file that contains the state of the generation. (the JSON file is continuously being updated as the state changes)
- Note that there is throttling on this endpoint (depending the license that you have)
- CDKAPI/TestAuthentication
- We will return workloads found with the sent settings in the request body. This endpoint should be used to validate your settings and credentials to ensure that calls to /StartDocumentGeneration will not encounter authentication issues or misconfigured settings.
- Note that there is no throttling on this endpoint.
- Also note that this action could take up to one minute to return
Both endpoints accept a JSON request body using a POST Verb.
The request body contains your settings. Each property of your JSON-formatted settings corresponds to some field or checkbox in the interface. A comprehensive list of what each property corresponds to is available on our interactive API documentation page.
Get started
These following steps will guide you through using our interactive API documentation to start your documentation generation.
The steps detailed below will demonstrate how to use our interactive API documentation to test endpoints and how to retrieve your custom JSON settings to make your own requests.
STEP 1 – LOGIN TO CLOUDOCKIT AND CONNECT YOUR ENVIRONMENT
Login to the Cloudockit platform and then connect to your environment via one of the following methods:
- AWS – Access Keys (https://www.cloudockit.com/knowledge-base/aws-role-and-keys-access-guide/)
- Azure – AAD Application (https://www.cloudockit.com/knowledge-base/connect-your-azure-subscription/)
- GCP – Service Account (https://www.cloudockit.com/knowledge-base/gcp-authentication-guide/)
Only the above-mentioned methods of connection are supported by Cloudockit API. Make sure to have connected via one of these methods, or the JSON settings will not generate the properties with the necessary credentials for you. Requests performed using those settings will fail.
STEP 2 – GO TO OUR INTERACTIVE API DOCUMENTATION PAGE
Once connected, select your subscription, account, or project for which you would like to generate documentation.
Then, navigate to our interactive API documentation page by clicking API.
STEP 3 – GO TO THE ENDPOINT AND UPDATES SETTINGS
You should first perform a call to /TestAuthentication to verify your credentials are valid and that there are workloads associated with the subscription/account/project.
Click /TestAuthentication
A request body is required to make requests to /StartDocumentGeneration and /TestAuthentication. The properties are initially set to the current settings in the interface.
To update your settings, change your settings using the interface as you normally would. Once your have set your desired settings, go back to /TestAuthentication and click on Reset Field With Current Settings. This will reset the field with the settings that are currently configured on the site.
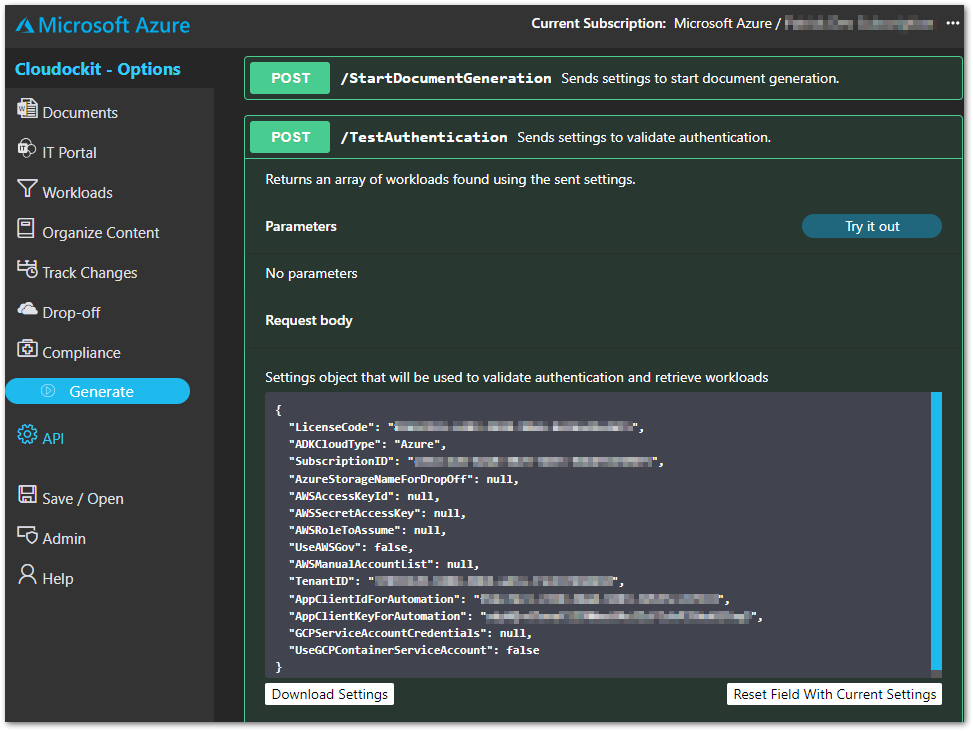
You can save these settings by clicking Download Settings to save the request body as a JSON file.
STEP 4 – MAKE A REQUEST
You are now ready to make a request using our interactive API documentation page.
Click Try it out
After you’ve clicked the button, the request body field becomes editable. Changes to the JSON settings can directly be made here instead of changing the settings on the site through the interface and resetting the field.
To see what each property corresponds to, consult the Properties – Documentation table at the bottom of the same page.

Click Execute to make the request
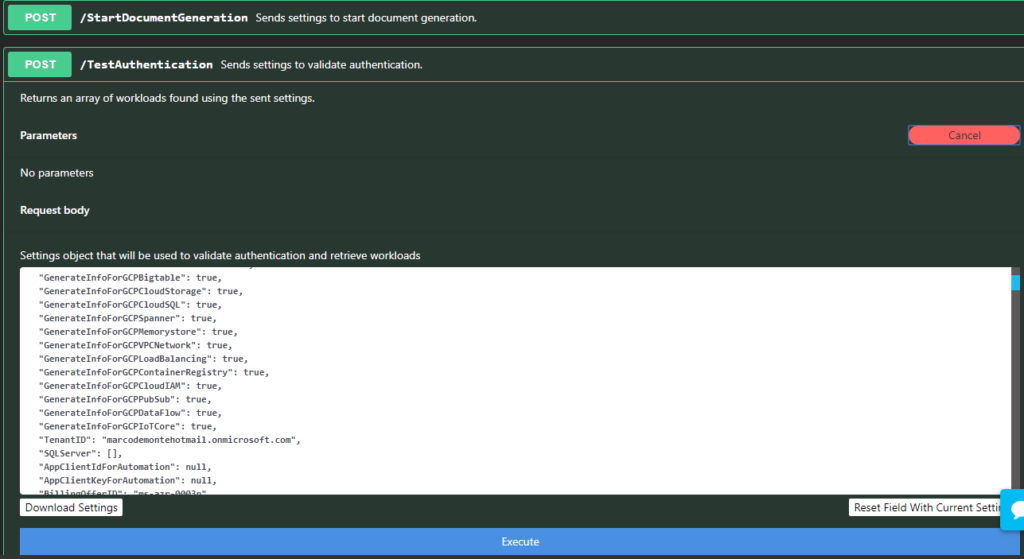
Your request has now been submitted to our server. The Responses section will be populated with the server’s response once the request has been processed.
If no errors occur, you should now see a JSON response containing workloads found in your subscription/account/project
STEP 5 – START DOCUMENT GENERATION
You are now ready to make a request to /StartDocumentGeneration.
Repeat steps 3-4 for /StartDocumentGeneration.
You have now successfully started generation of your documentation with your desired settings.
Annexes
WEBHOOK SUPPORT
You can specify the parameter CallbackUrl to get automatically notified when the document generation is finished.
Cloudockit will POST a message to the endpoint you specify with a form Value named stateUrl that contains a URL where you will be able to retrieve the state of the document generation. The State is the equivalent of what you see in Cloudockit web UI when the document generation is in progress. The portion that you want to have a look at is the collection named GeneratedDocuments which contains a collection of all documents generated with a URL and a Name.
Here is an extract of a state .json file that you can get from the stateURL address that is pointed to the URL that you specify in the CallbackURL:
{
…
"GeneratedDocuments": [
{
"Url": "https://xxx.blob.core.windows.net/xxxx",
"Name": "Cloudockit Generated Documentation"
}
],
…
}